
Note: staff-provided content does not represent an official statement from FARGOS Development, LLC. The policy on staff-authored content can be found here.
Go back to Geoff's home page.
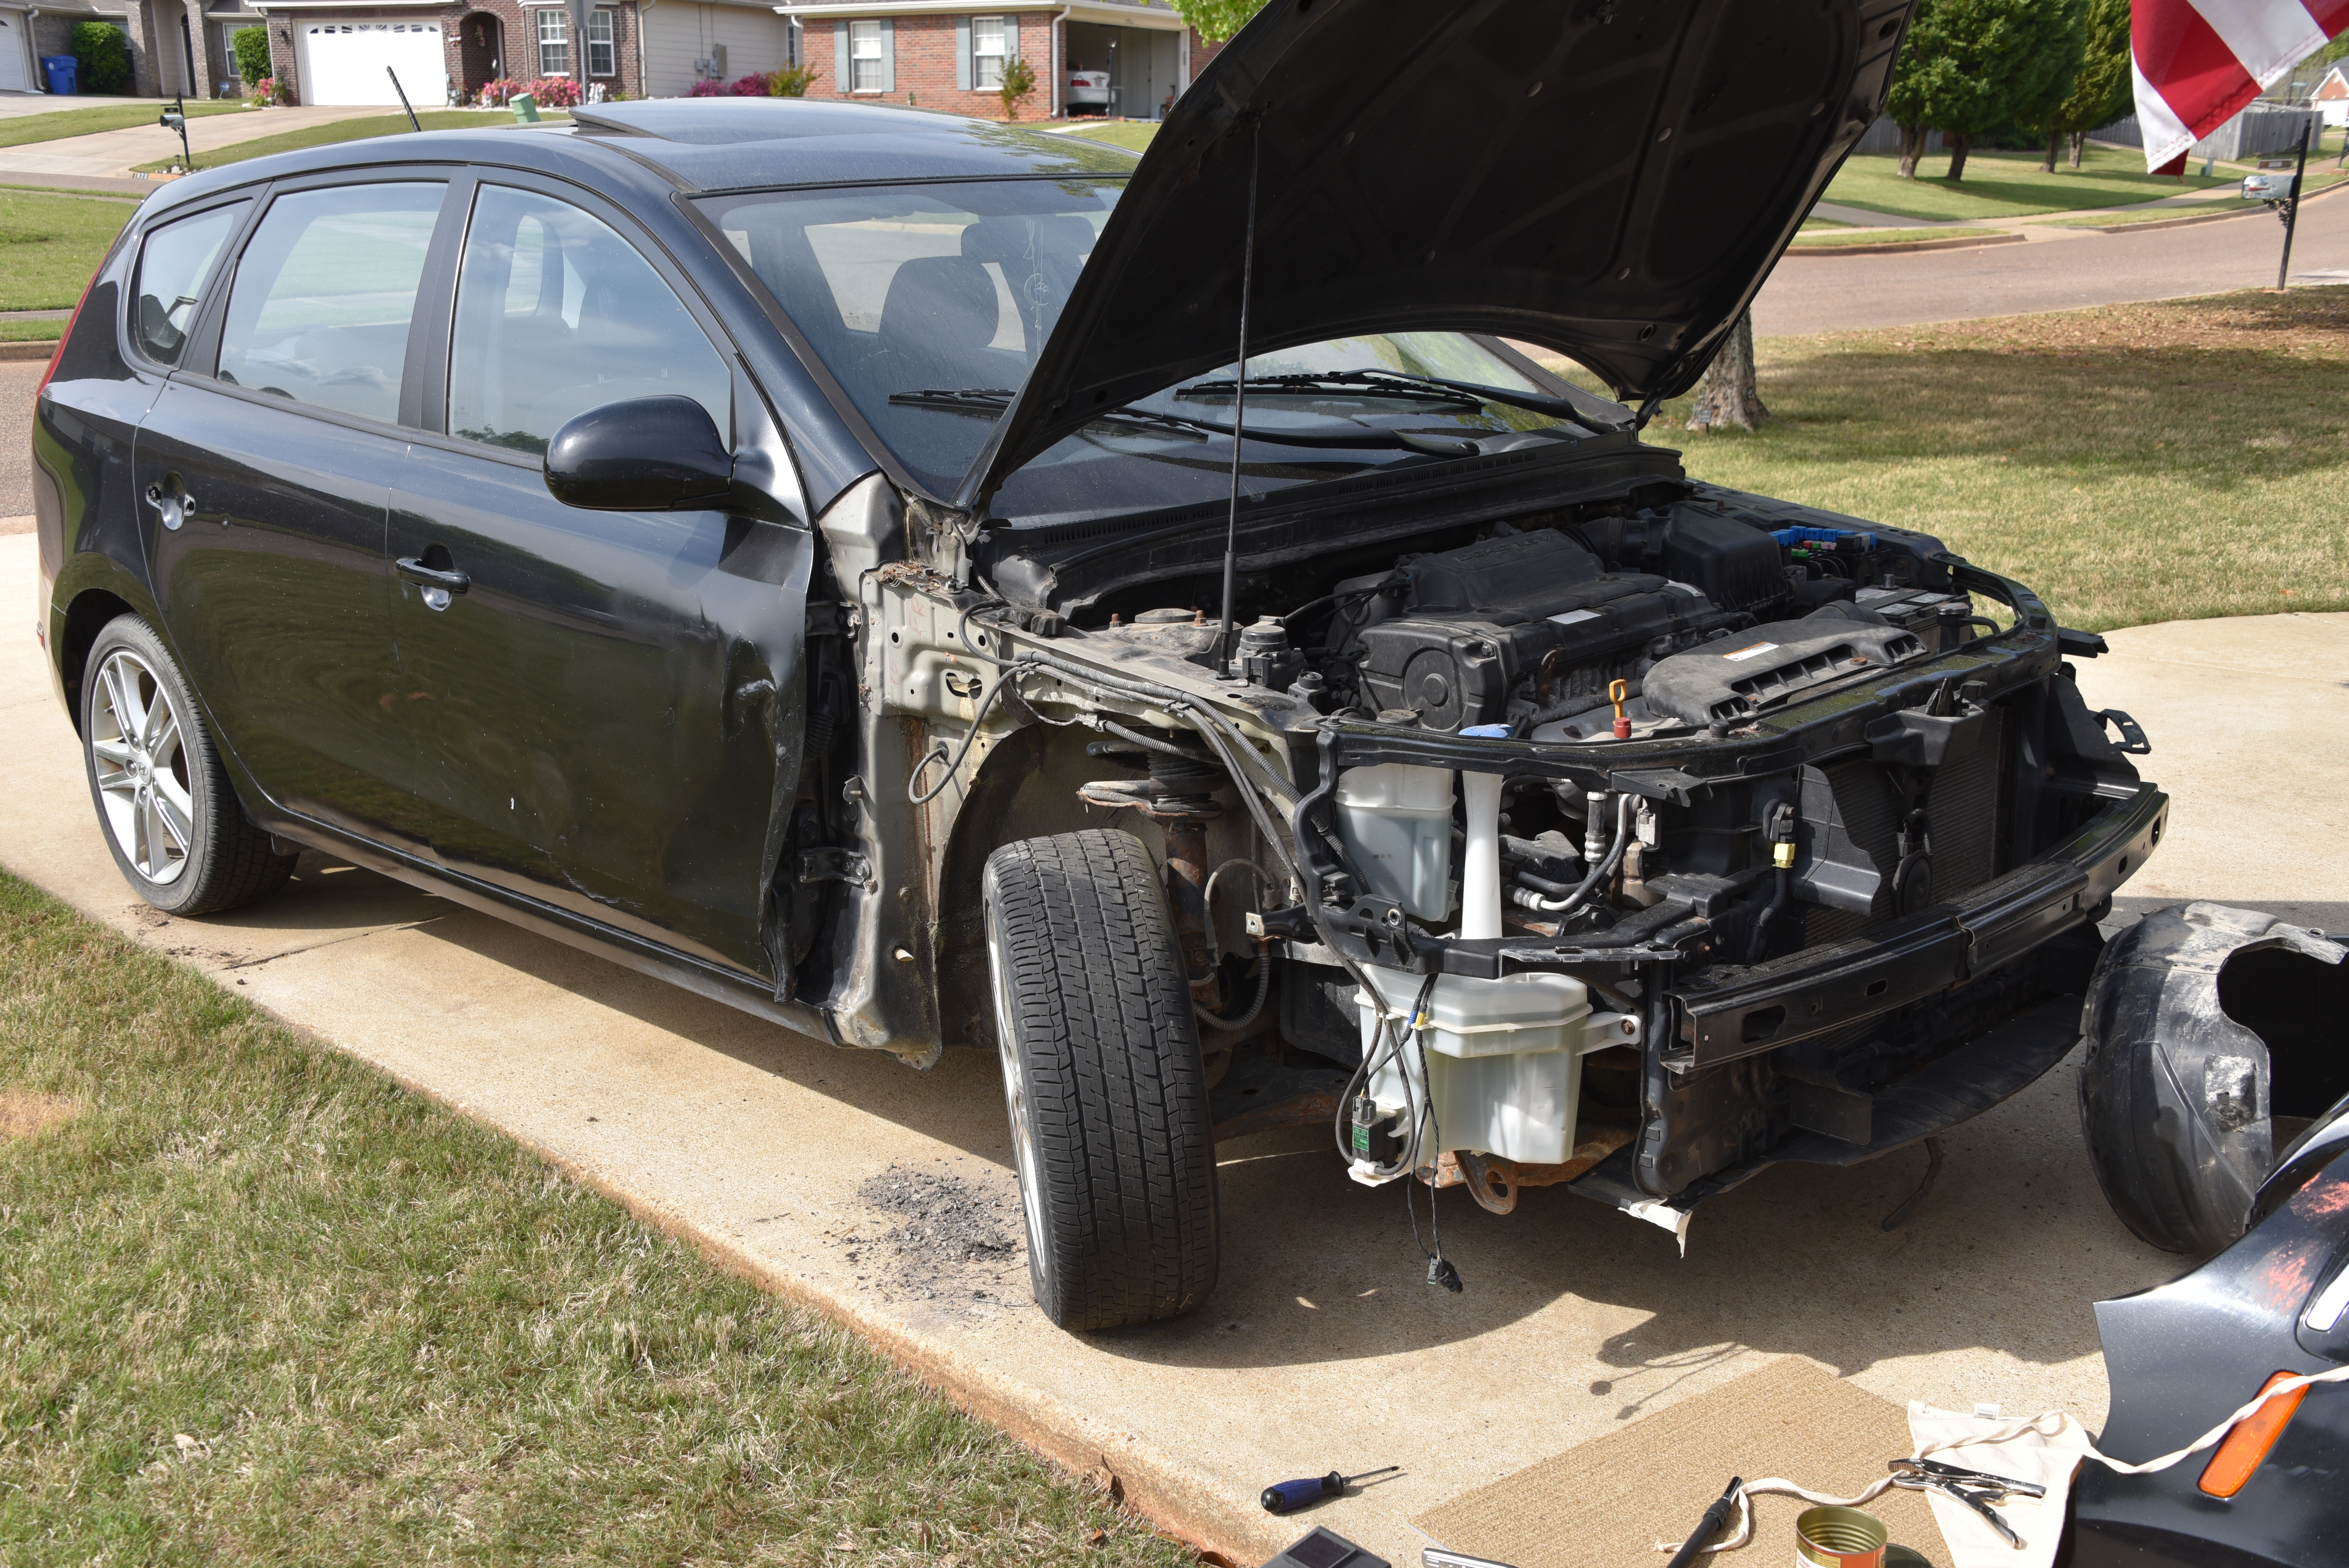
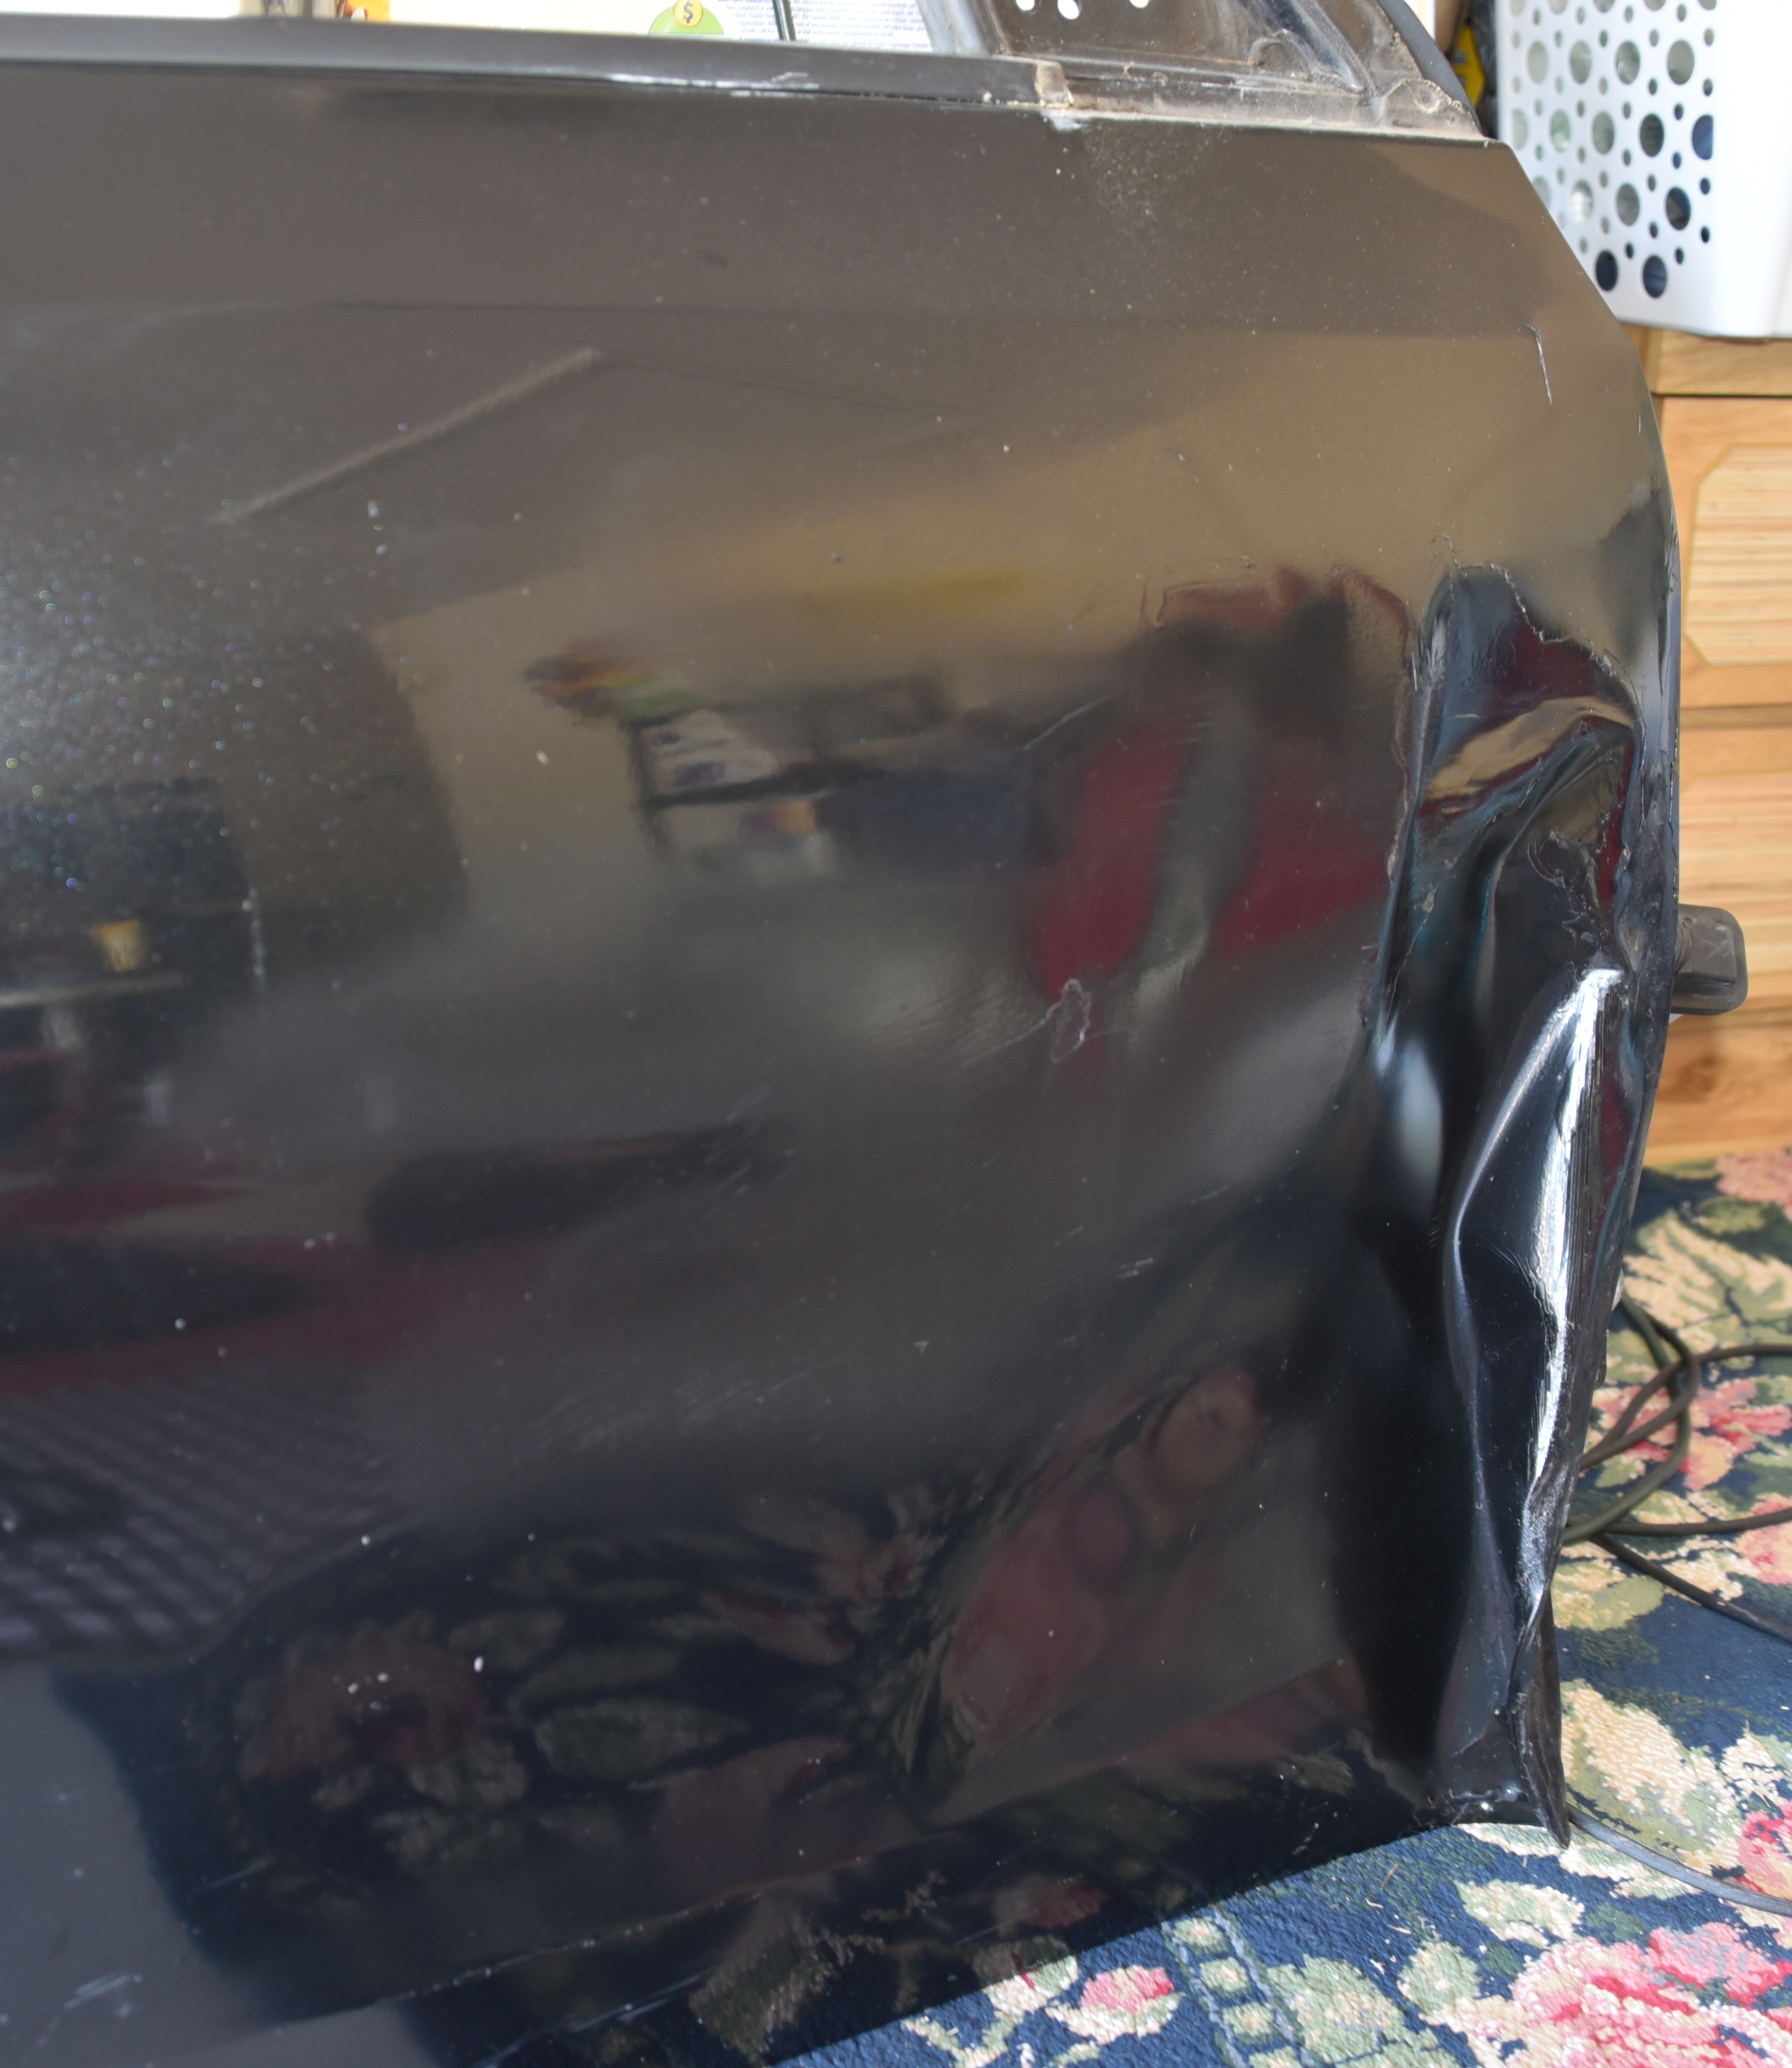
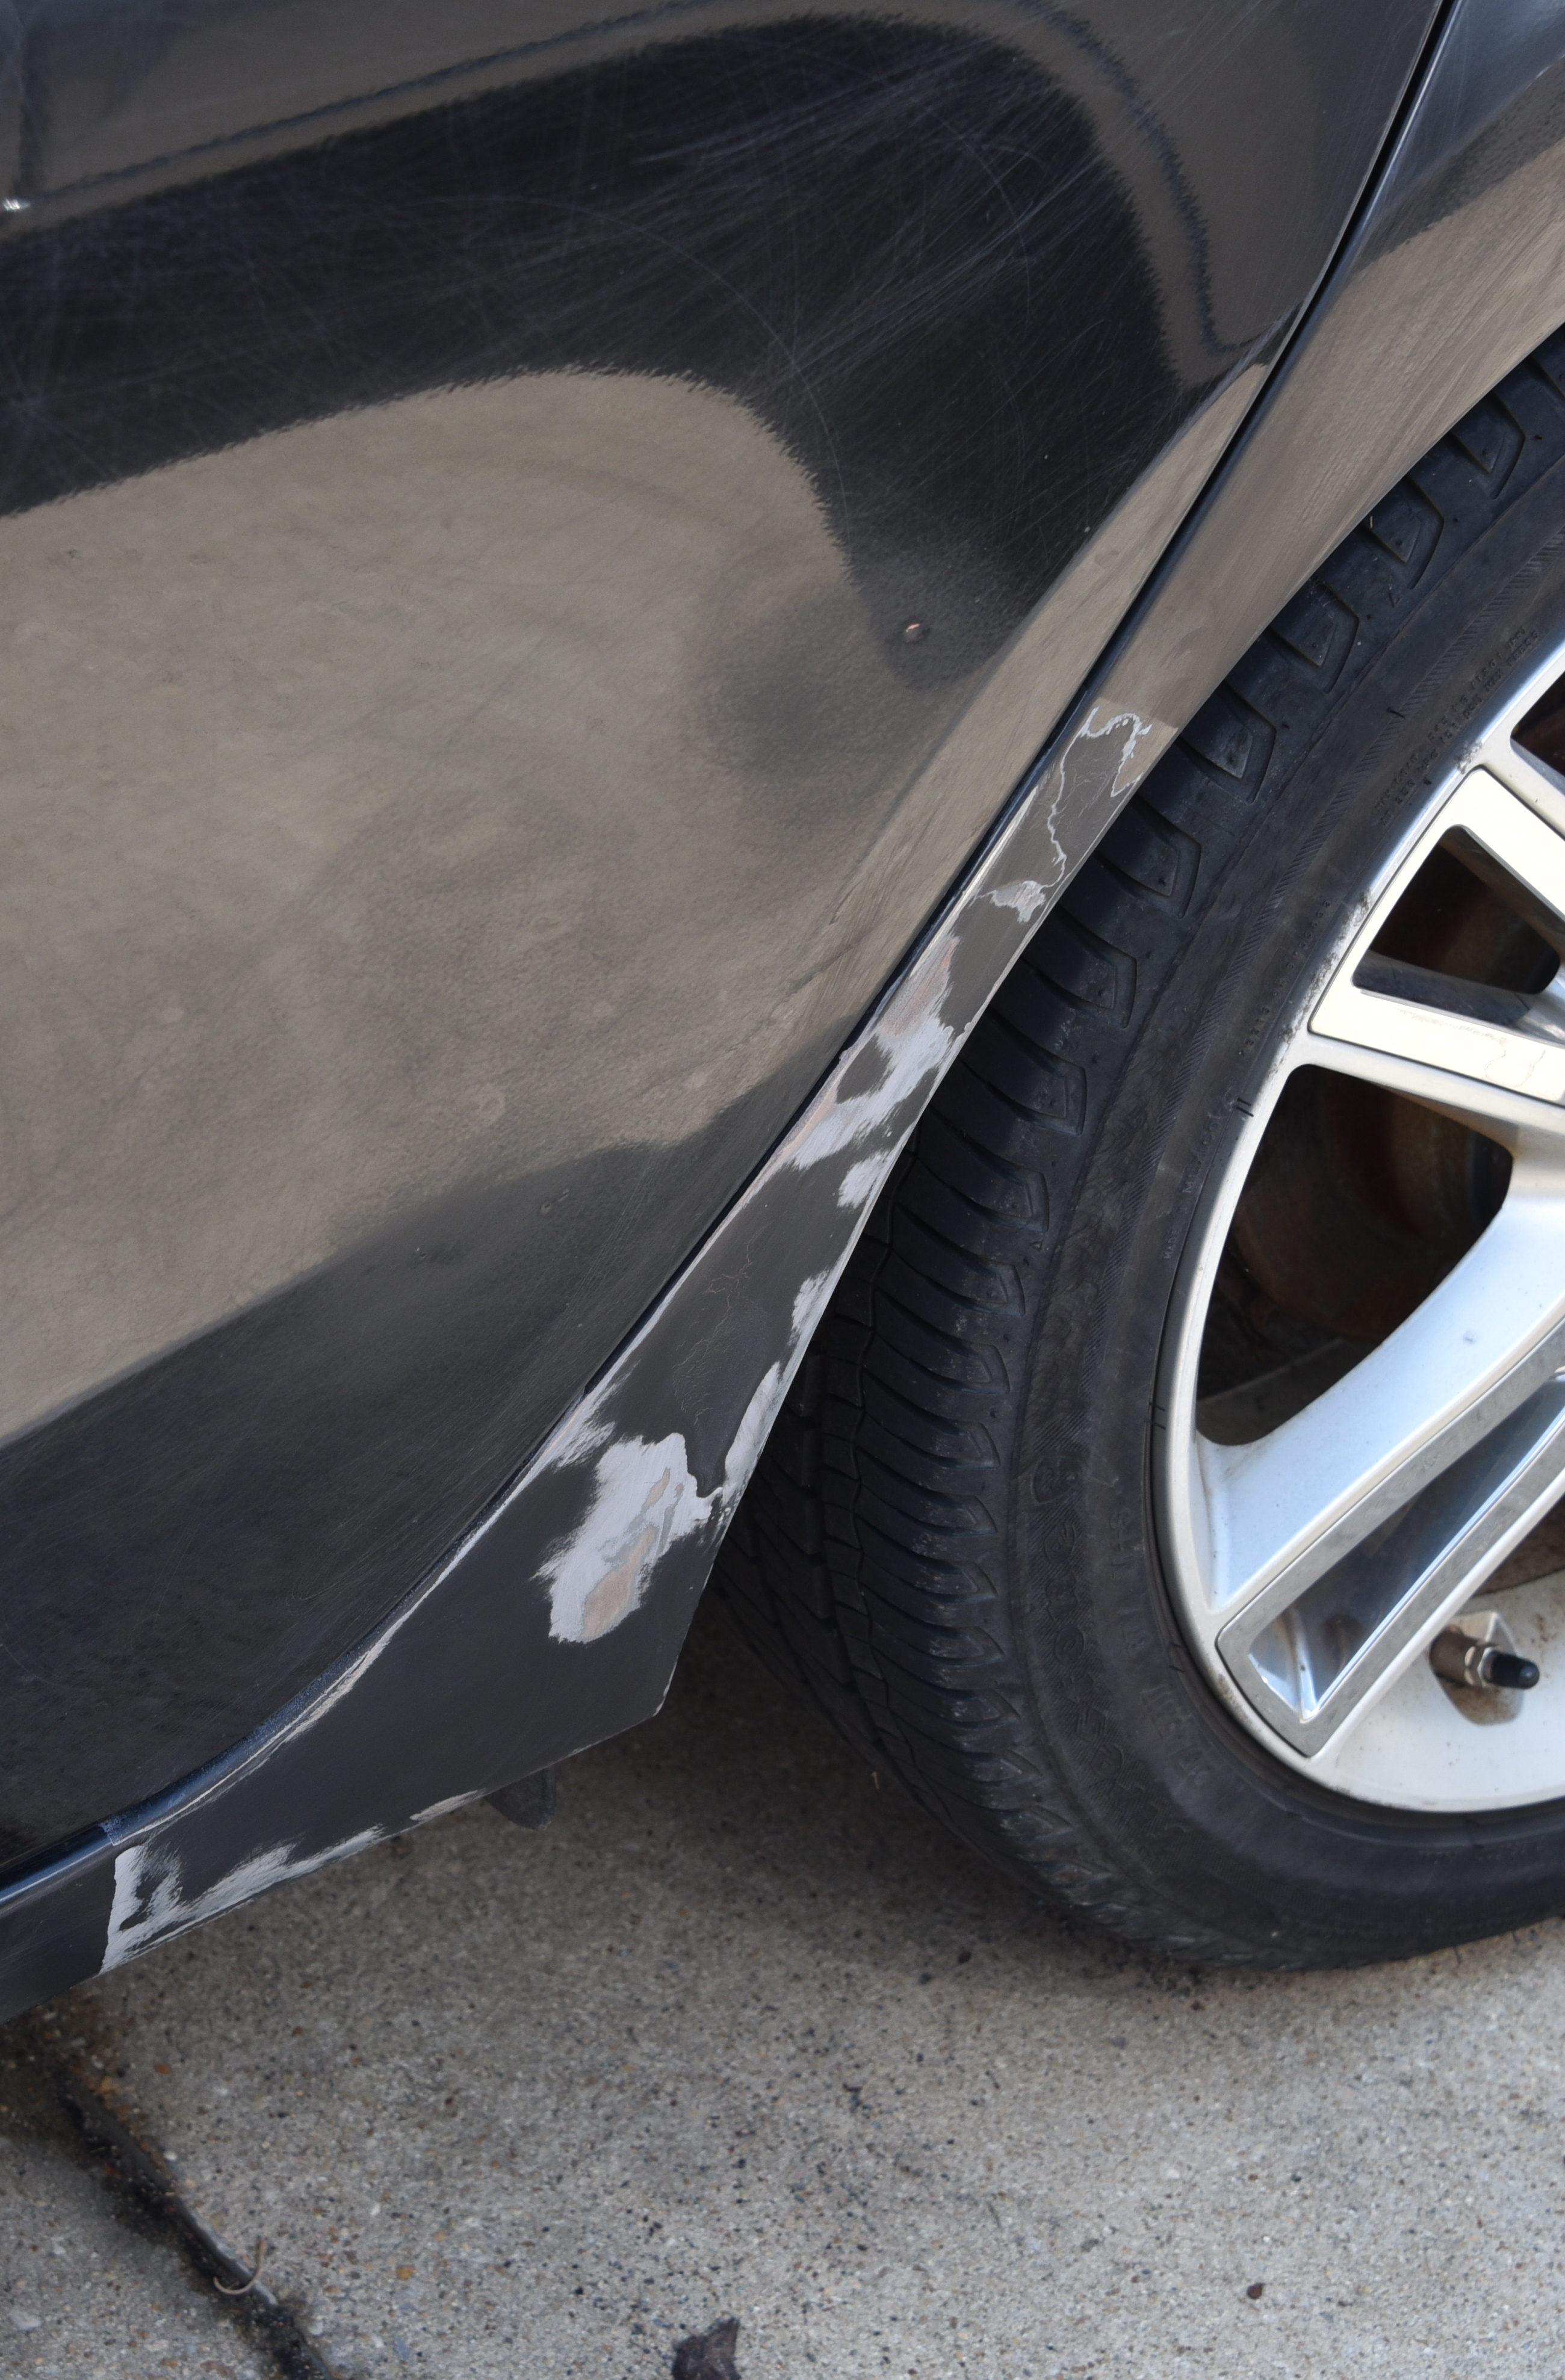
A relative skidded off the side of an icy Michigan road and clipped a street sign, which dented the car's right-hand front fender, crushed and peeled back the right-hand front door, and ripped away the rear door handle. Surprisingly, the amount of paint scratching was not too bad. Due to a confluence of circumstances, I ended up taking the damaged car south and eventually undertook a repair job that lasted a lot longer than expected.
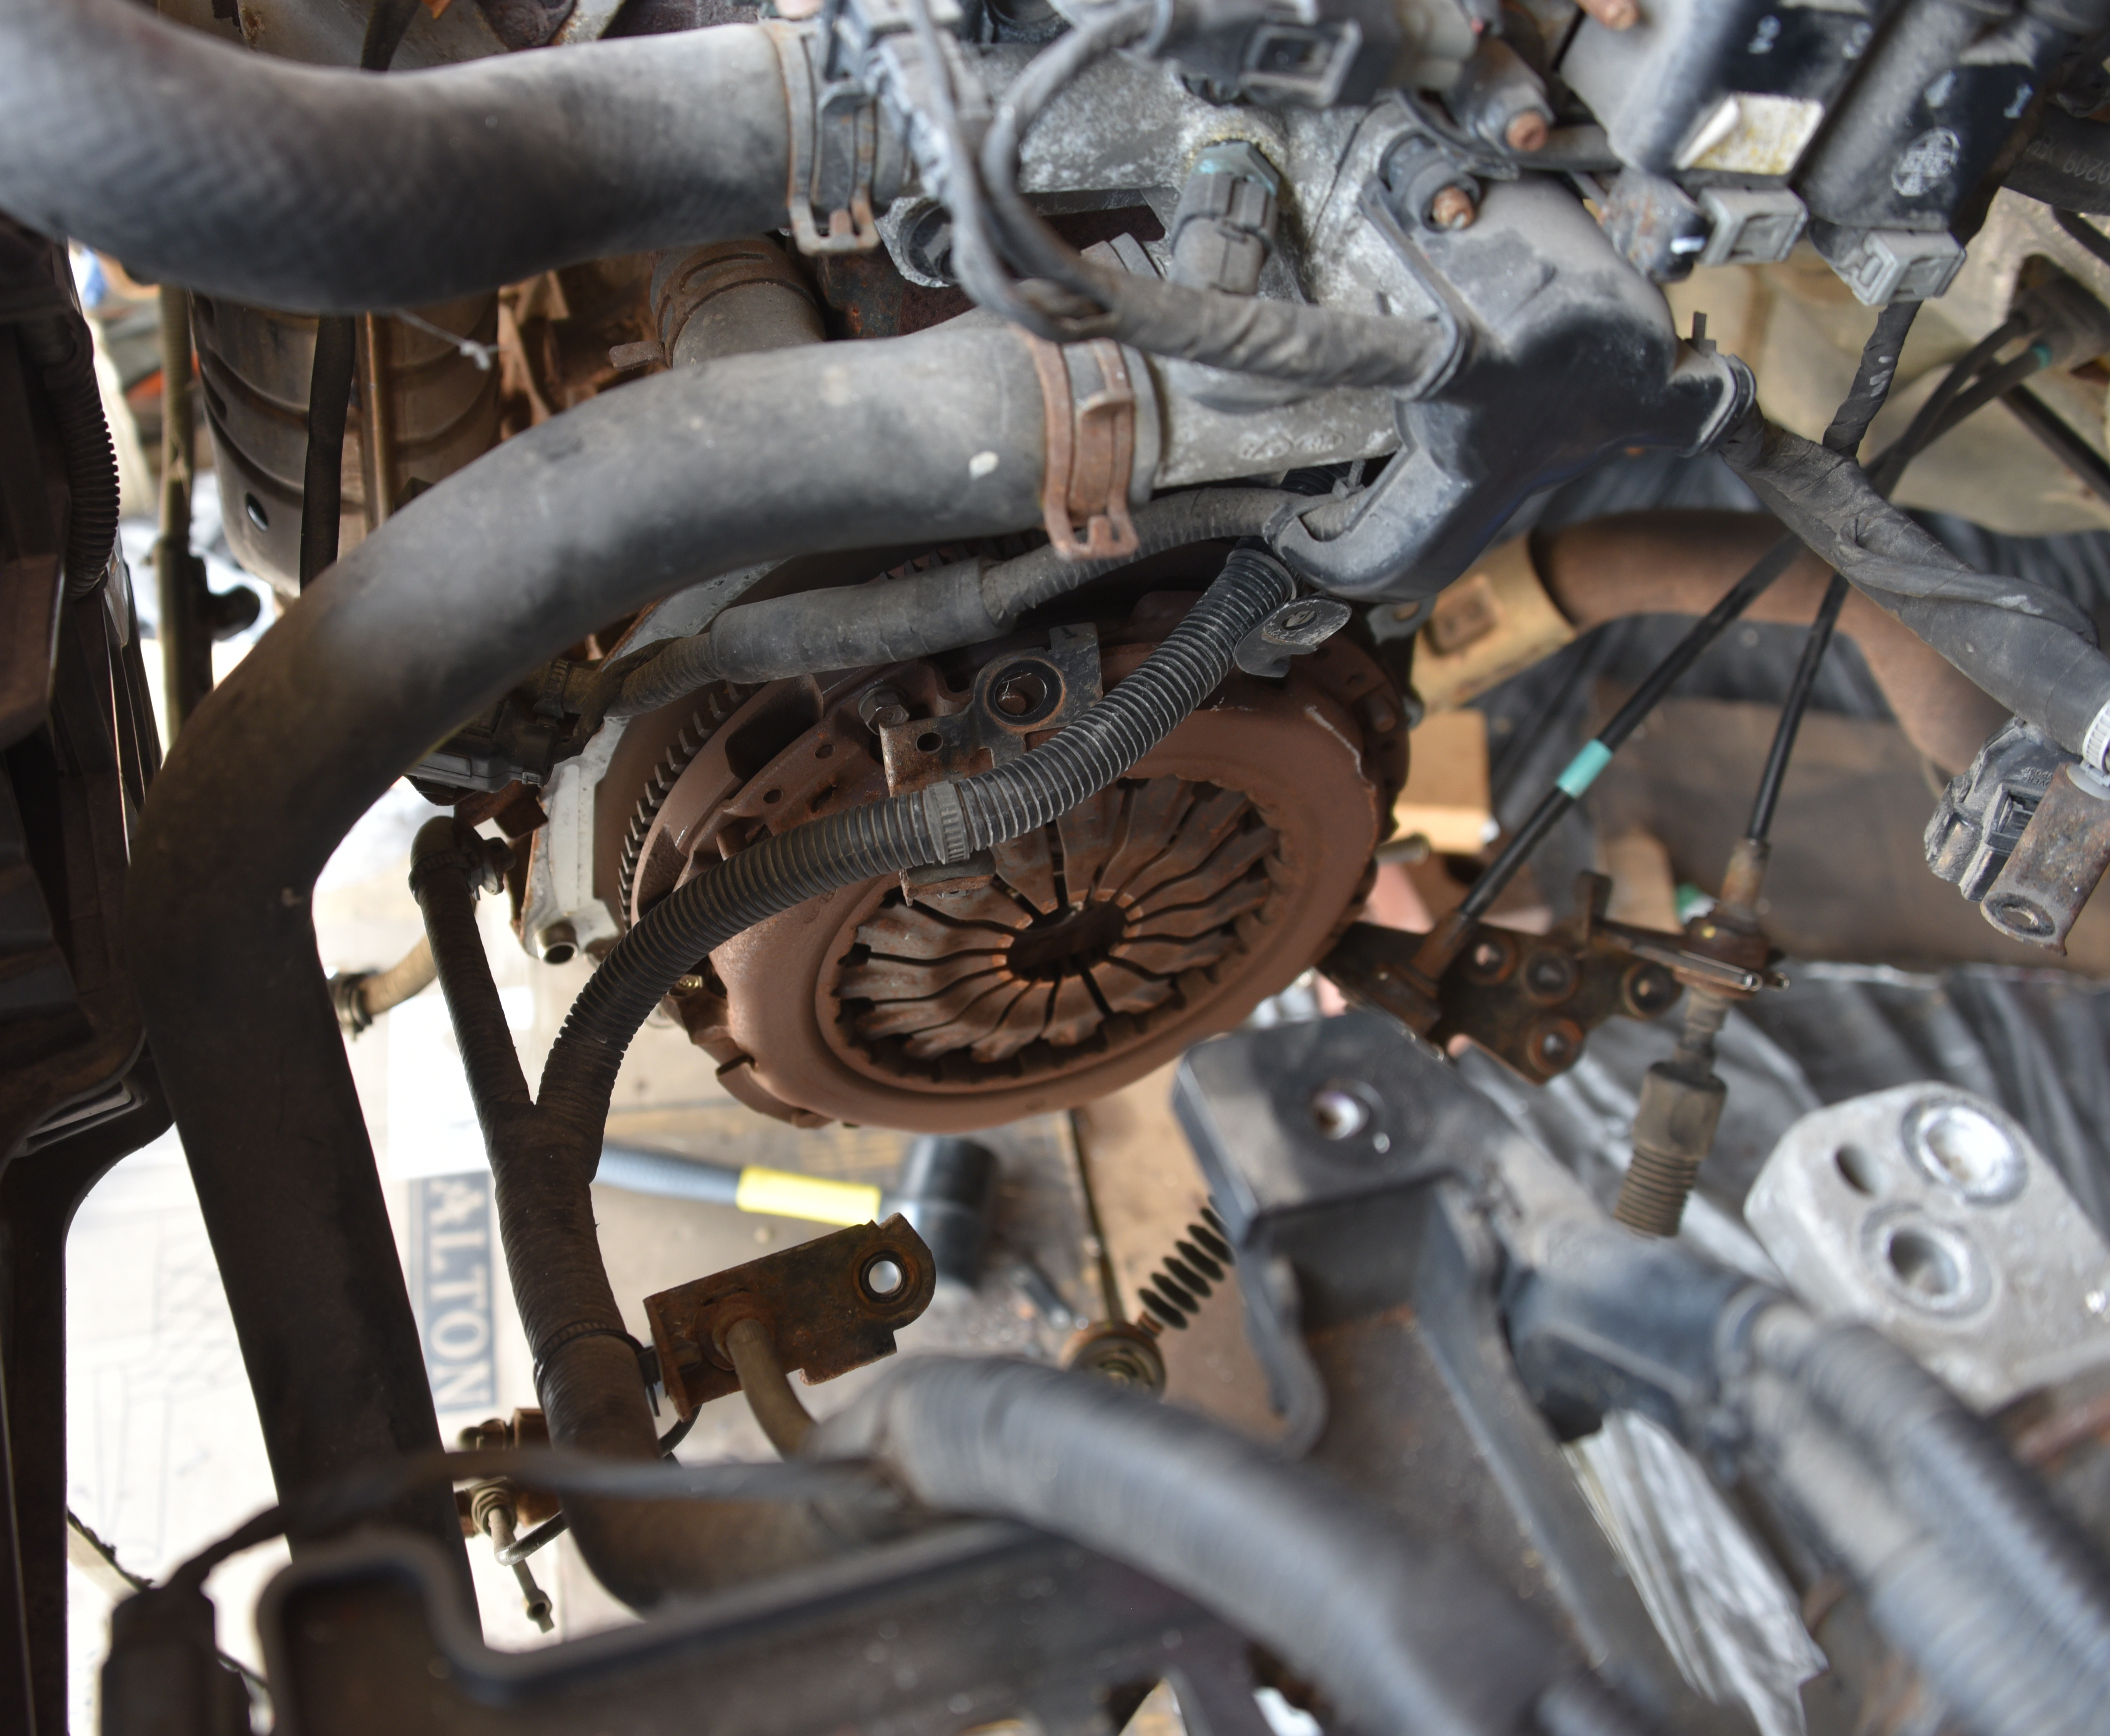
Prior to starting any work, my sister had asked to take the car for a spin as it had been a long time since she had driven a manual transmission. Tragically, the car suffered a clutch failure and limping it back to the driveway was barely possible. Since the clutch would not engage, it was no longer possible to shift from neutral to first gear or reverse. This inability to move the car under its own power was going to really hurt.
The car had previously suffered a few other minor accidents, such as leaping through a garage door when the clutch pedal was let out by an inexperienced driver who had started the car in attempt to be helpful and warm it up. Nature also performed an unfriendly act by dropping a tree limb onto the left fender, leaving behind a crush wound. There was also some rusting in the left-hand rear wheel well.
The first step was to take up a hammer and dolly and bang away, bending the dented and warped sheet metal on the fenders back into place.
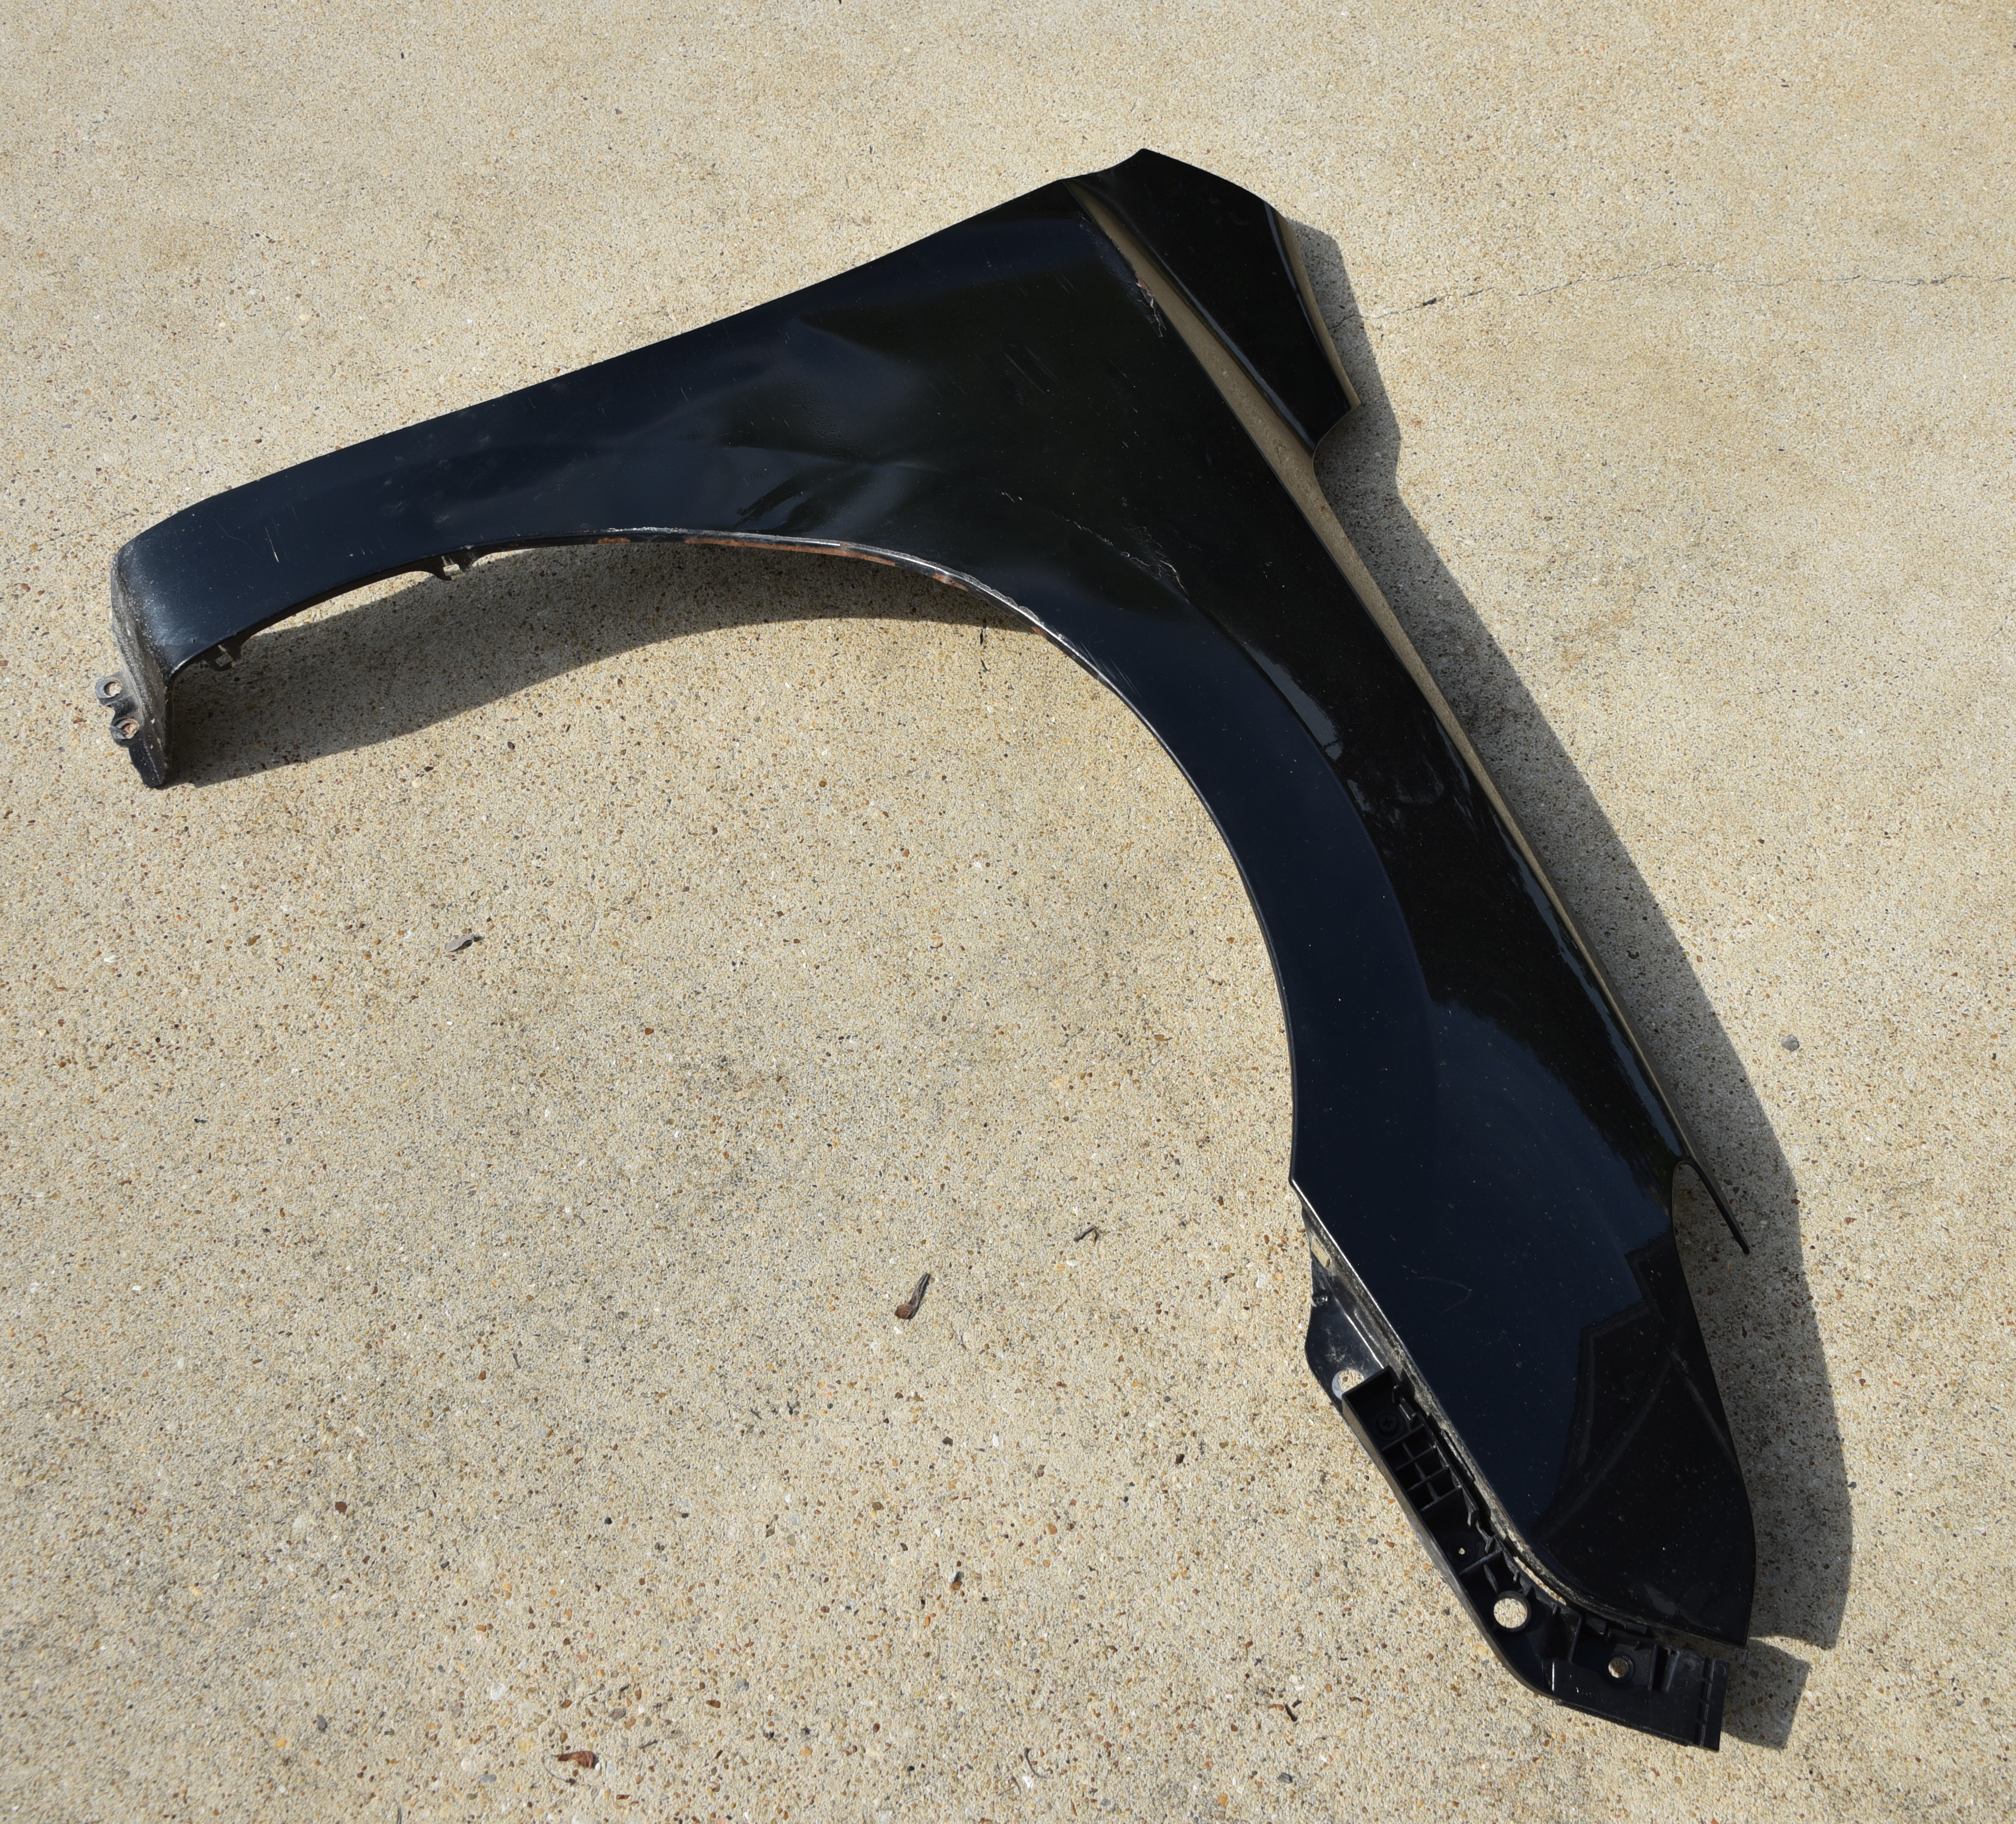
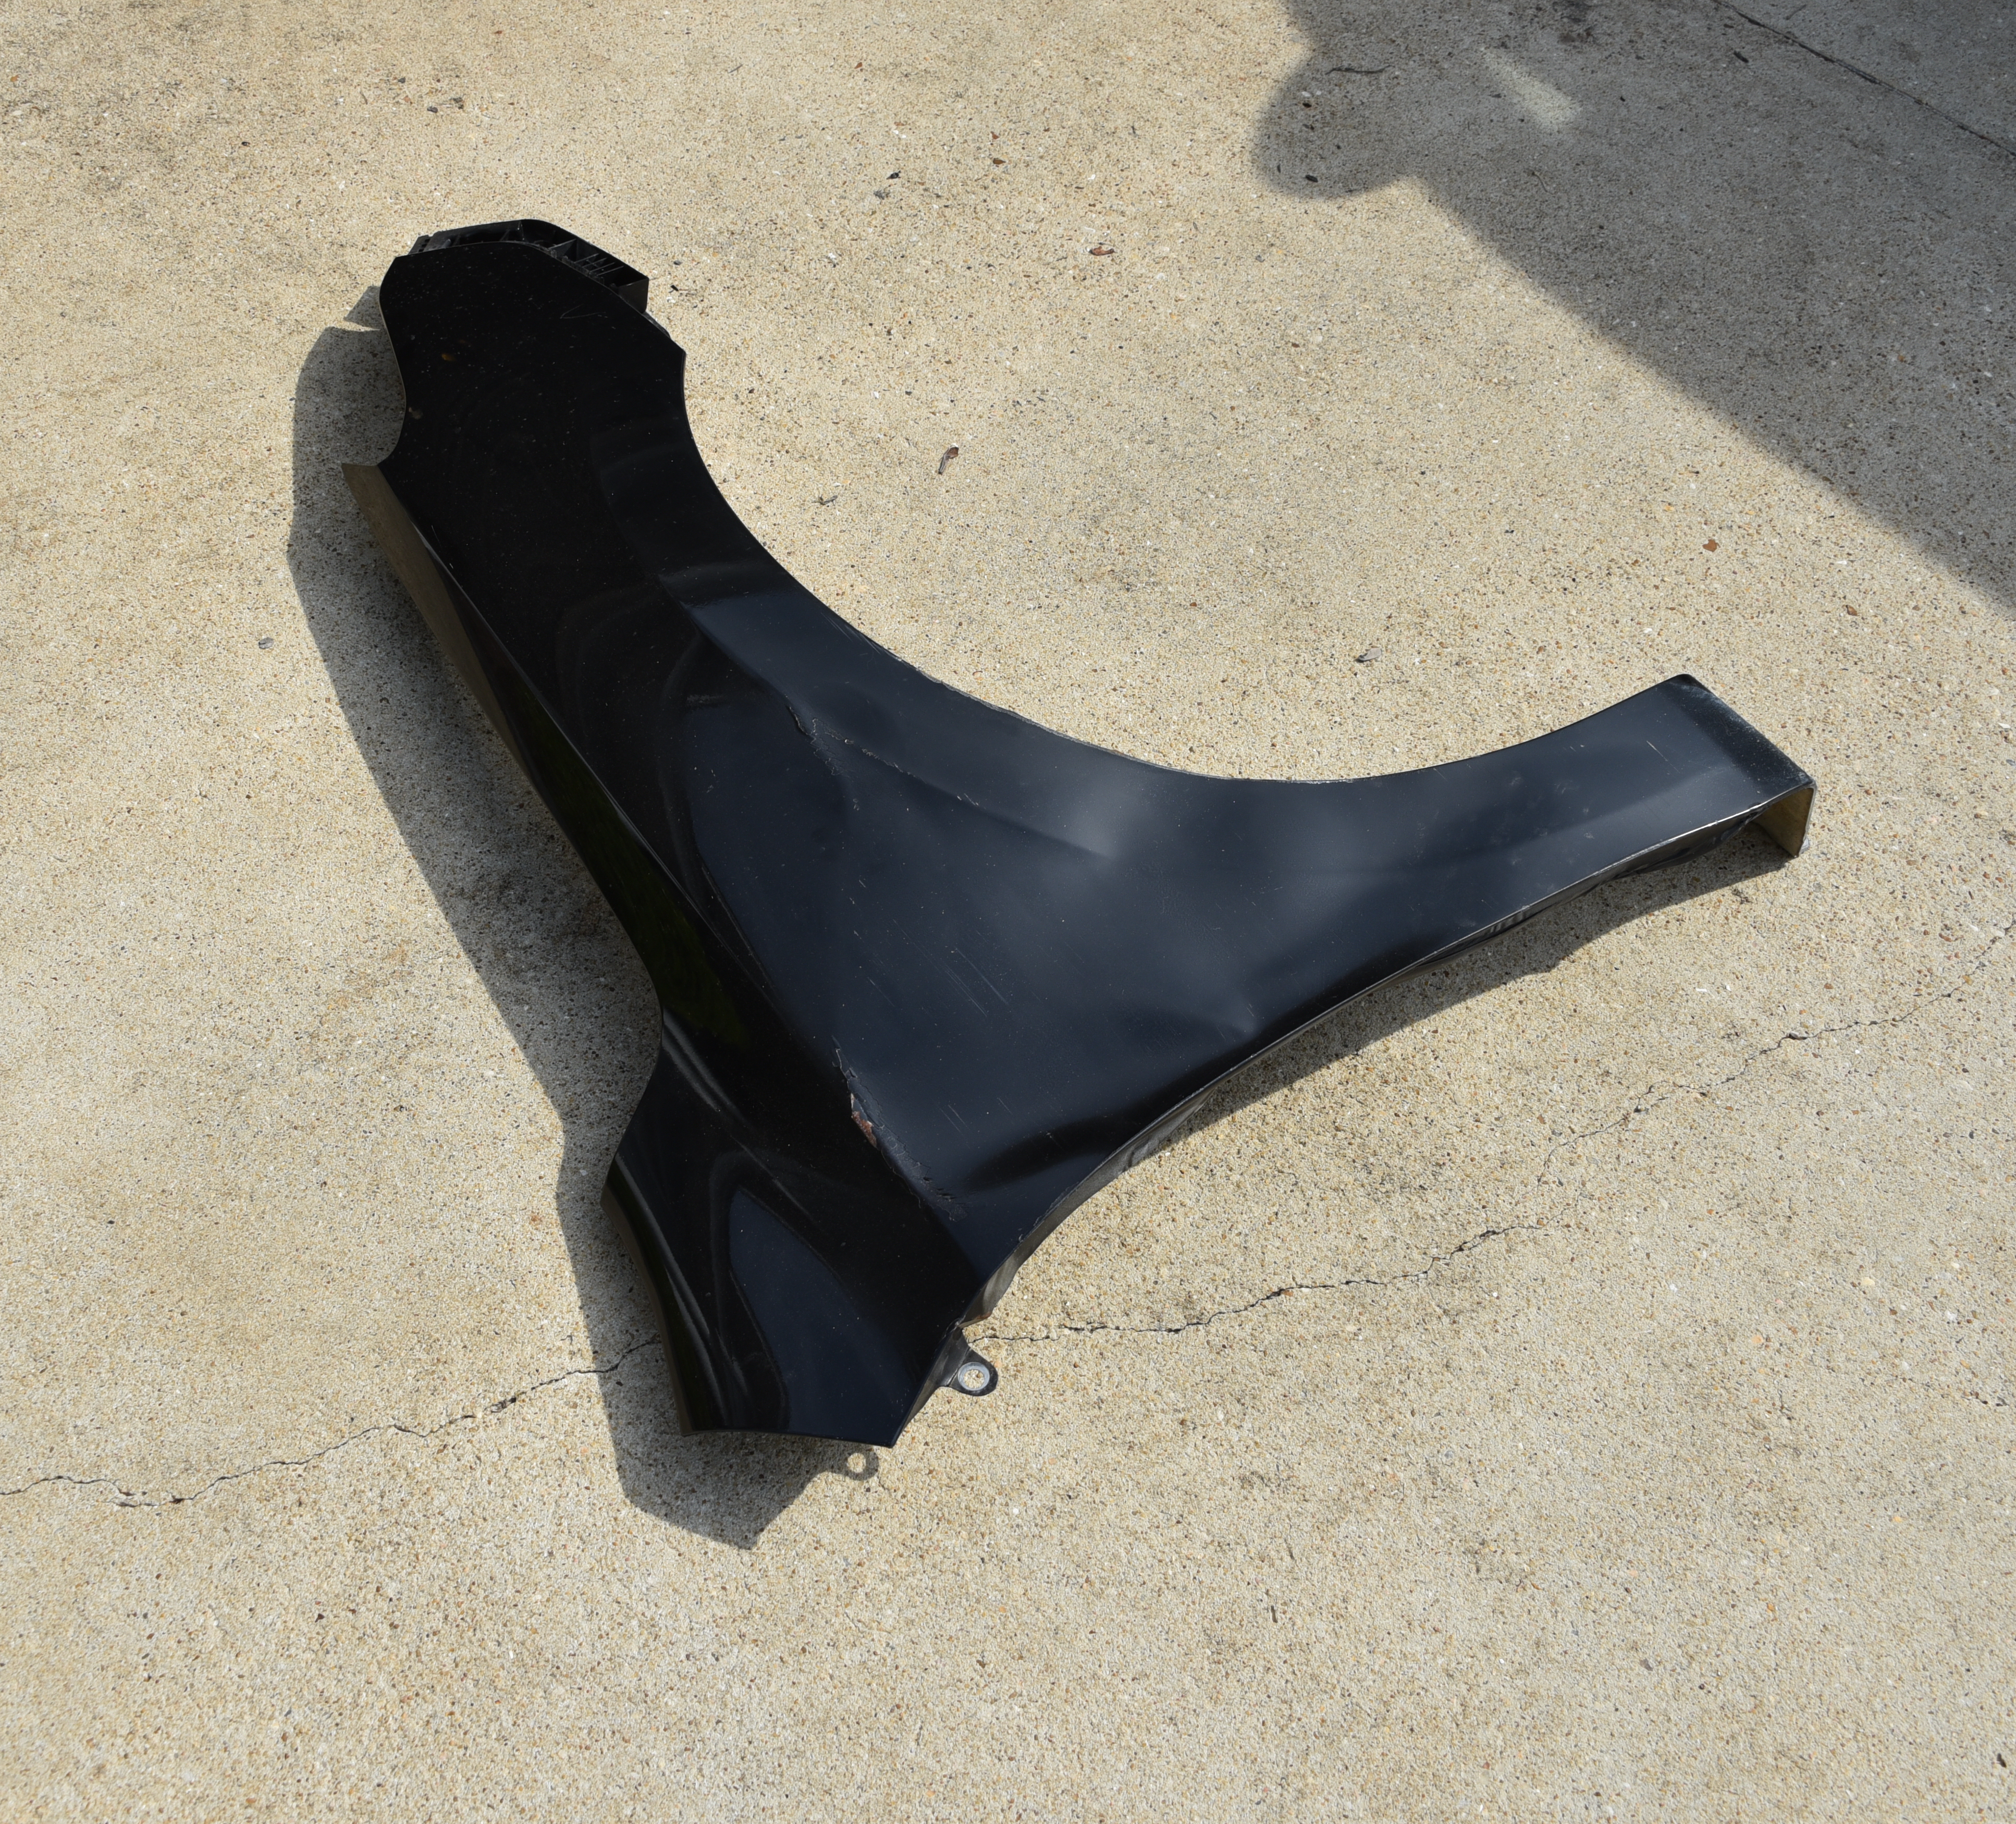
After several days of hammering, which was no doubt annoying to the neighborhood, the fenders were manipulated back into decent shape.
The damaged door was very resistant to simple hammering due to the trauma it had suffered. The leading edge of the door frame had been curled over as if a giant old-style can opener had been applied.
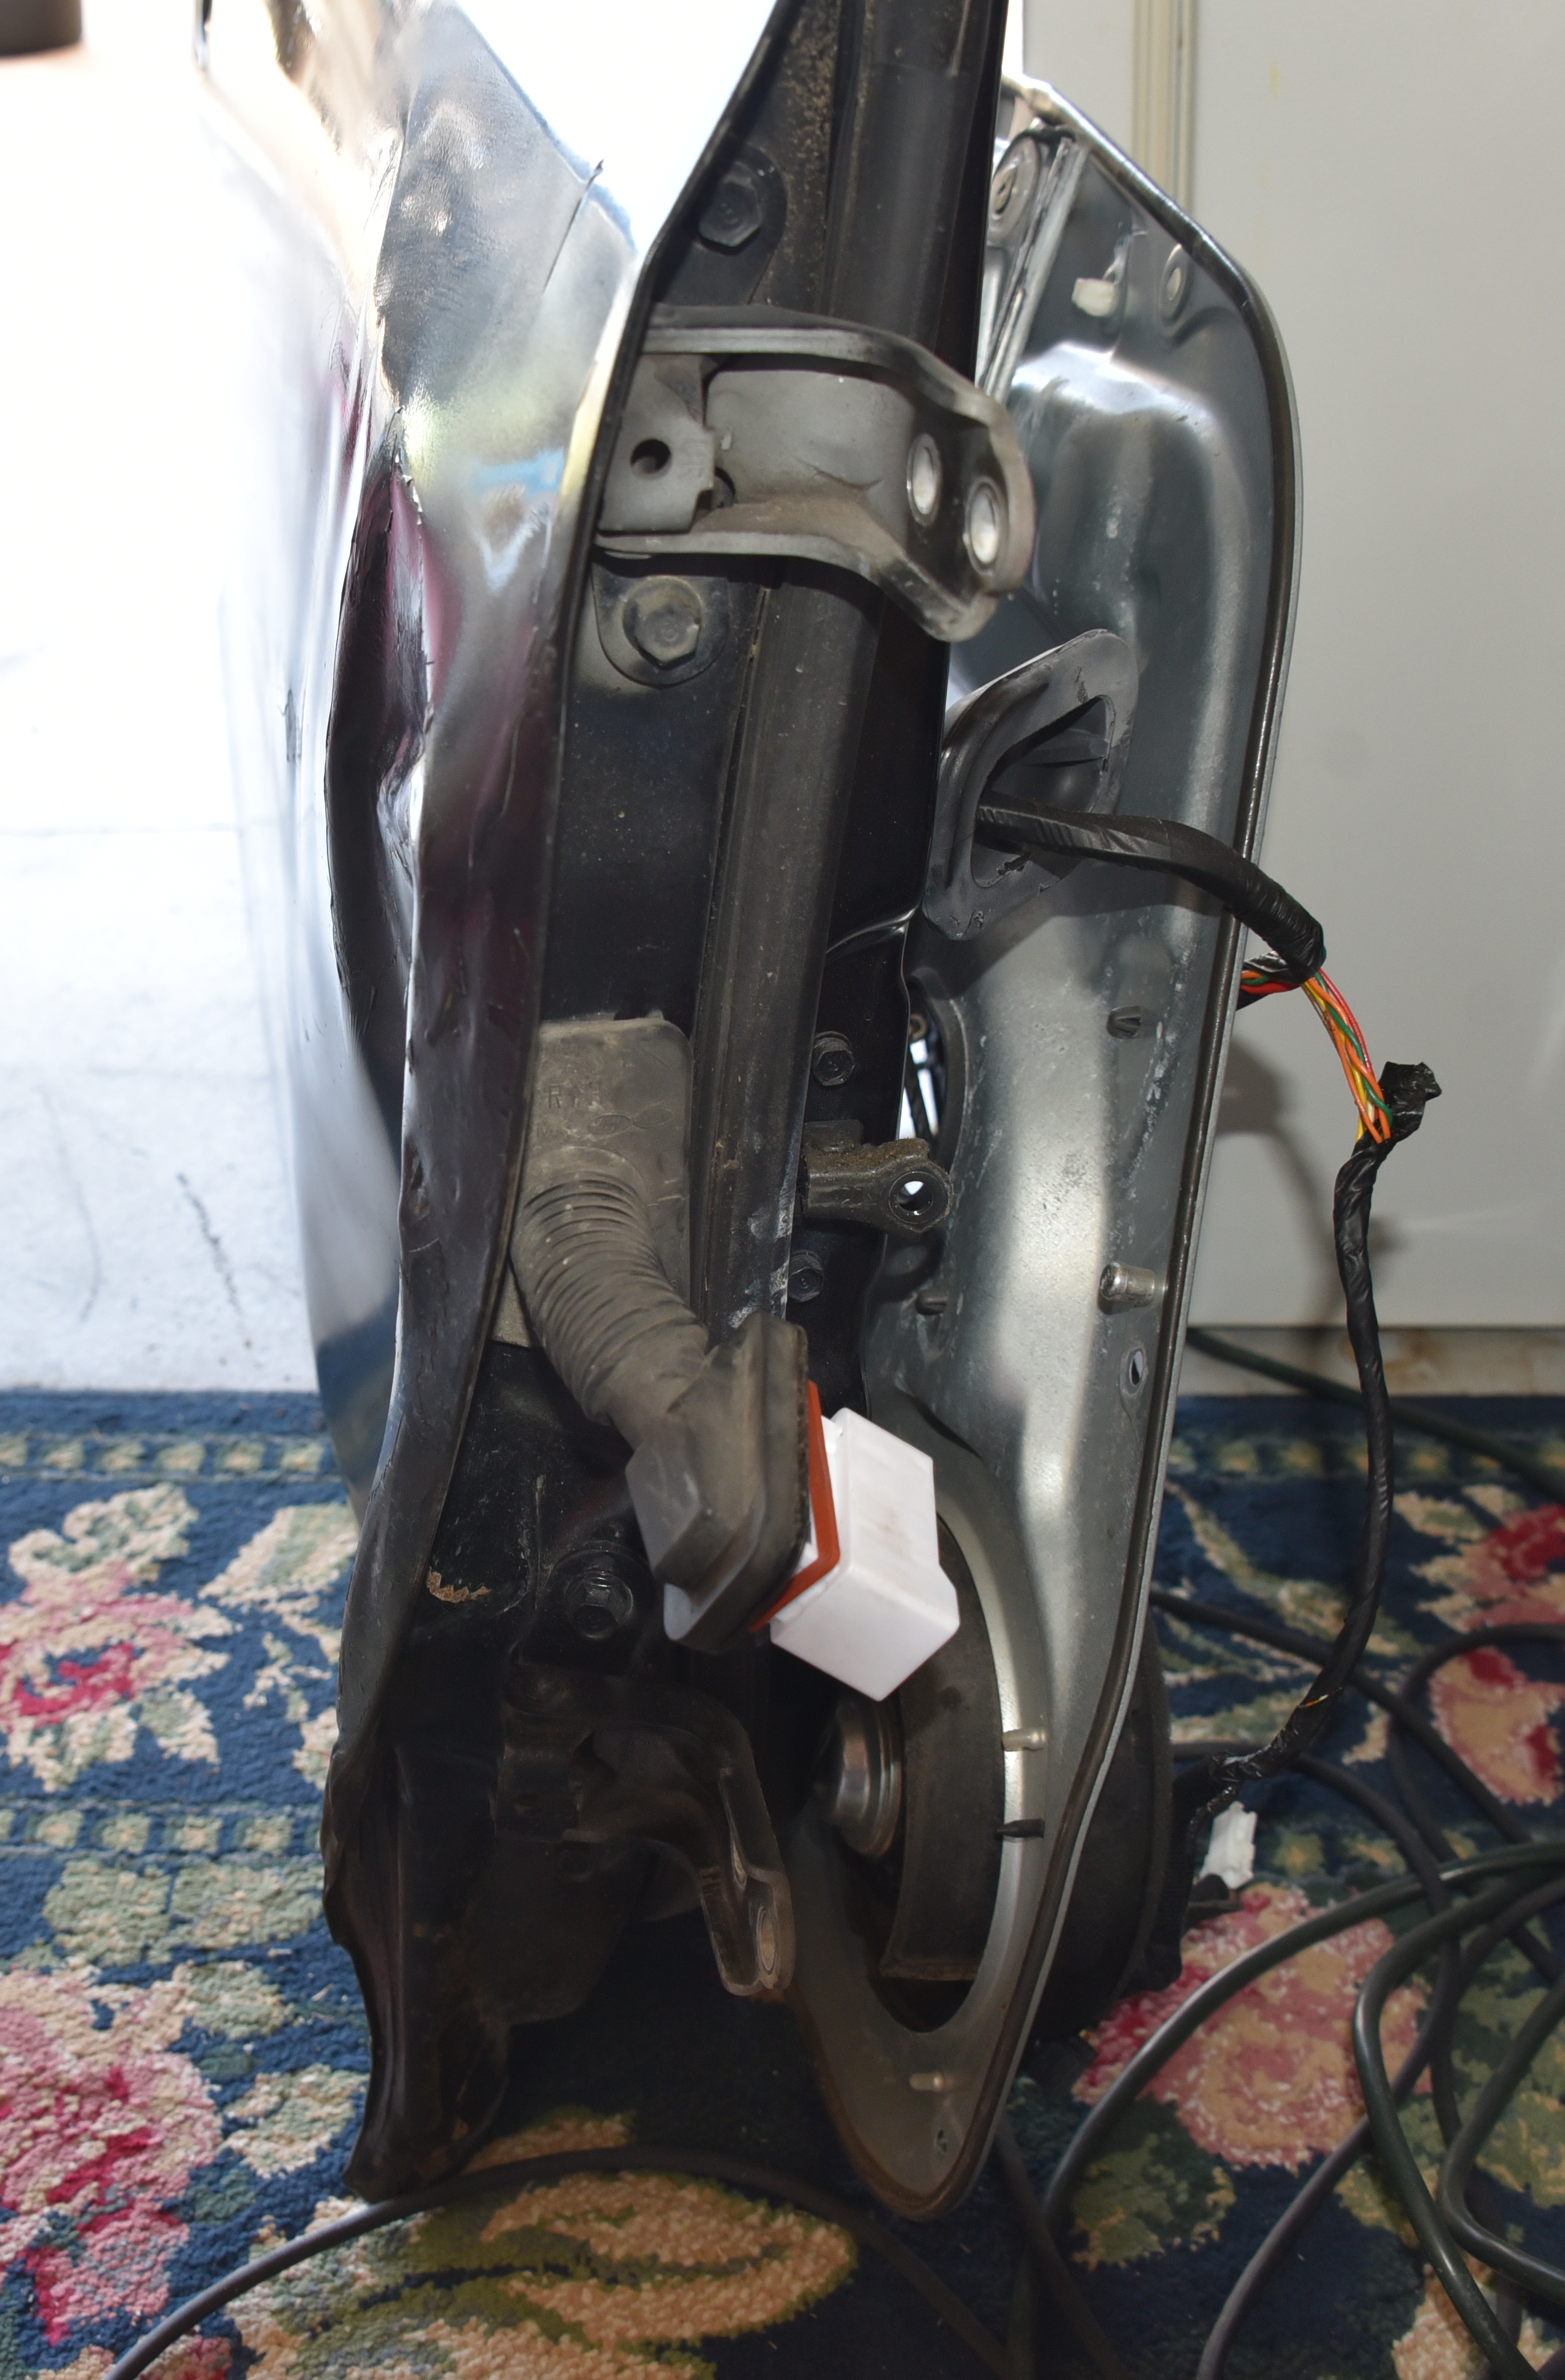
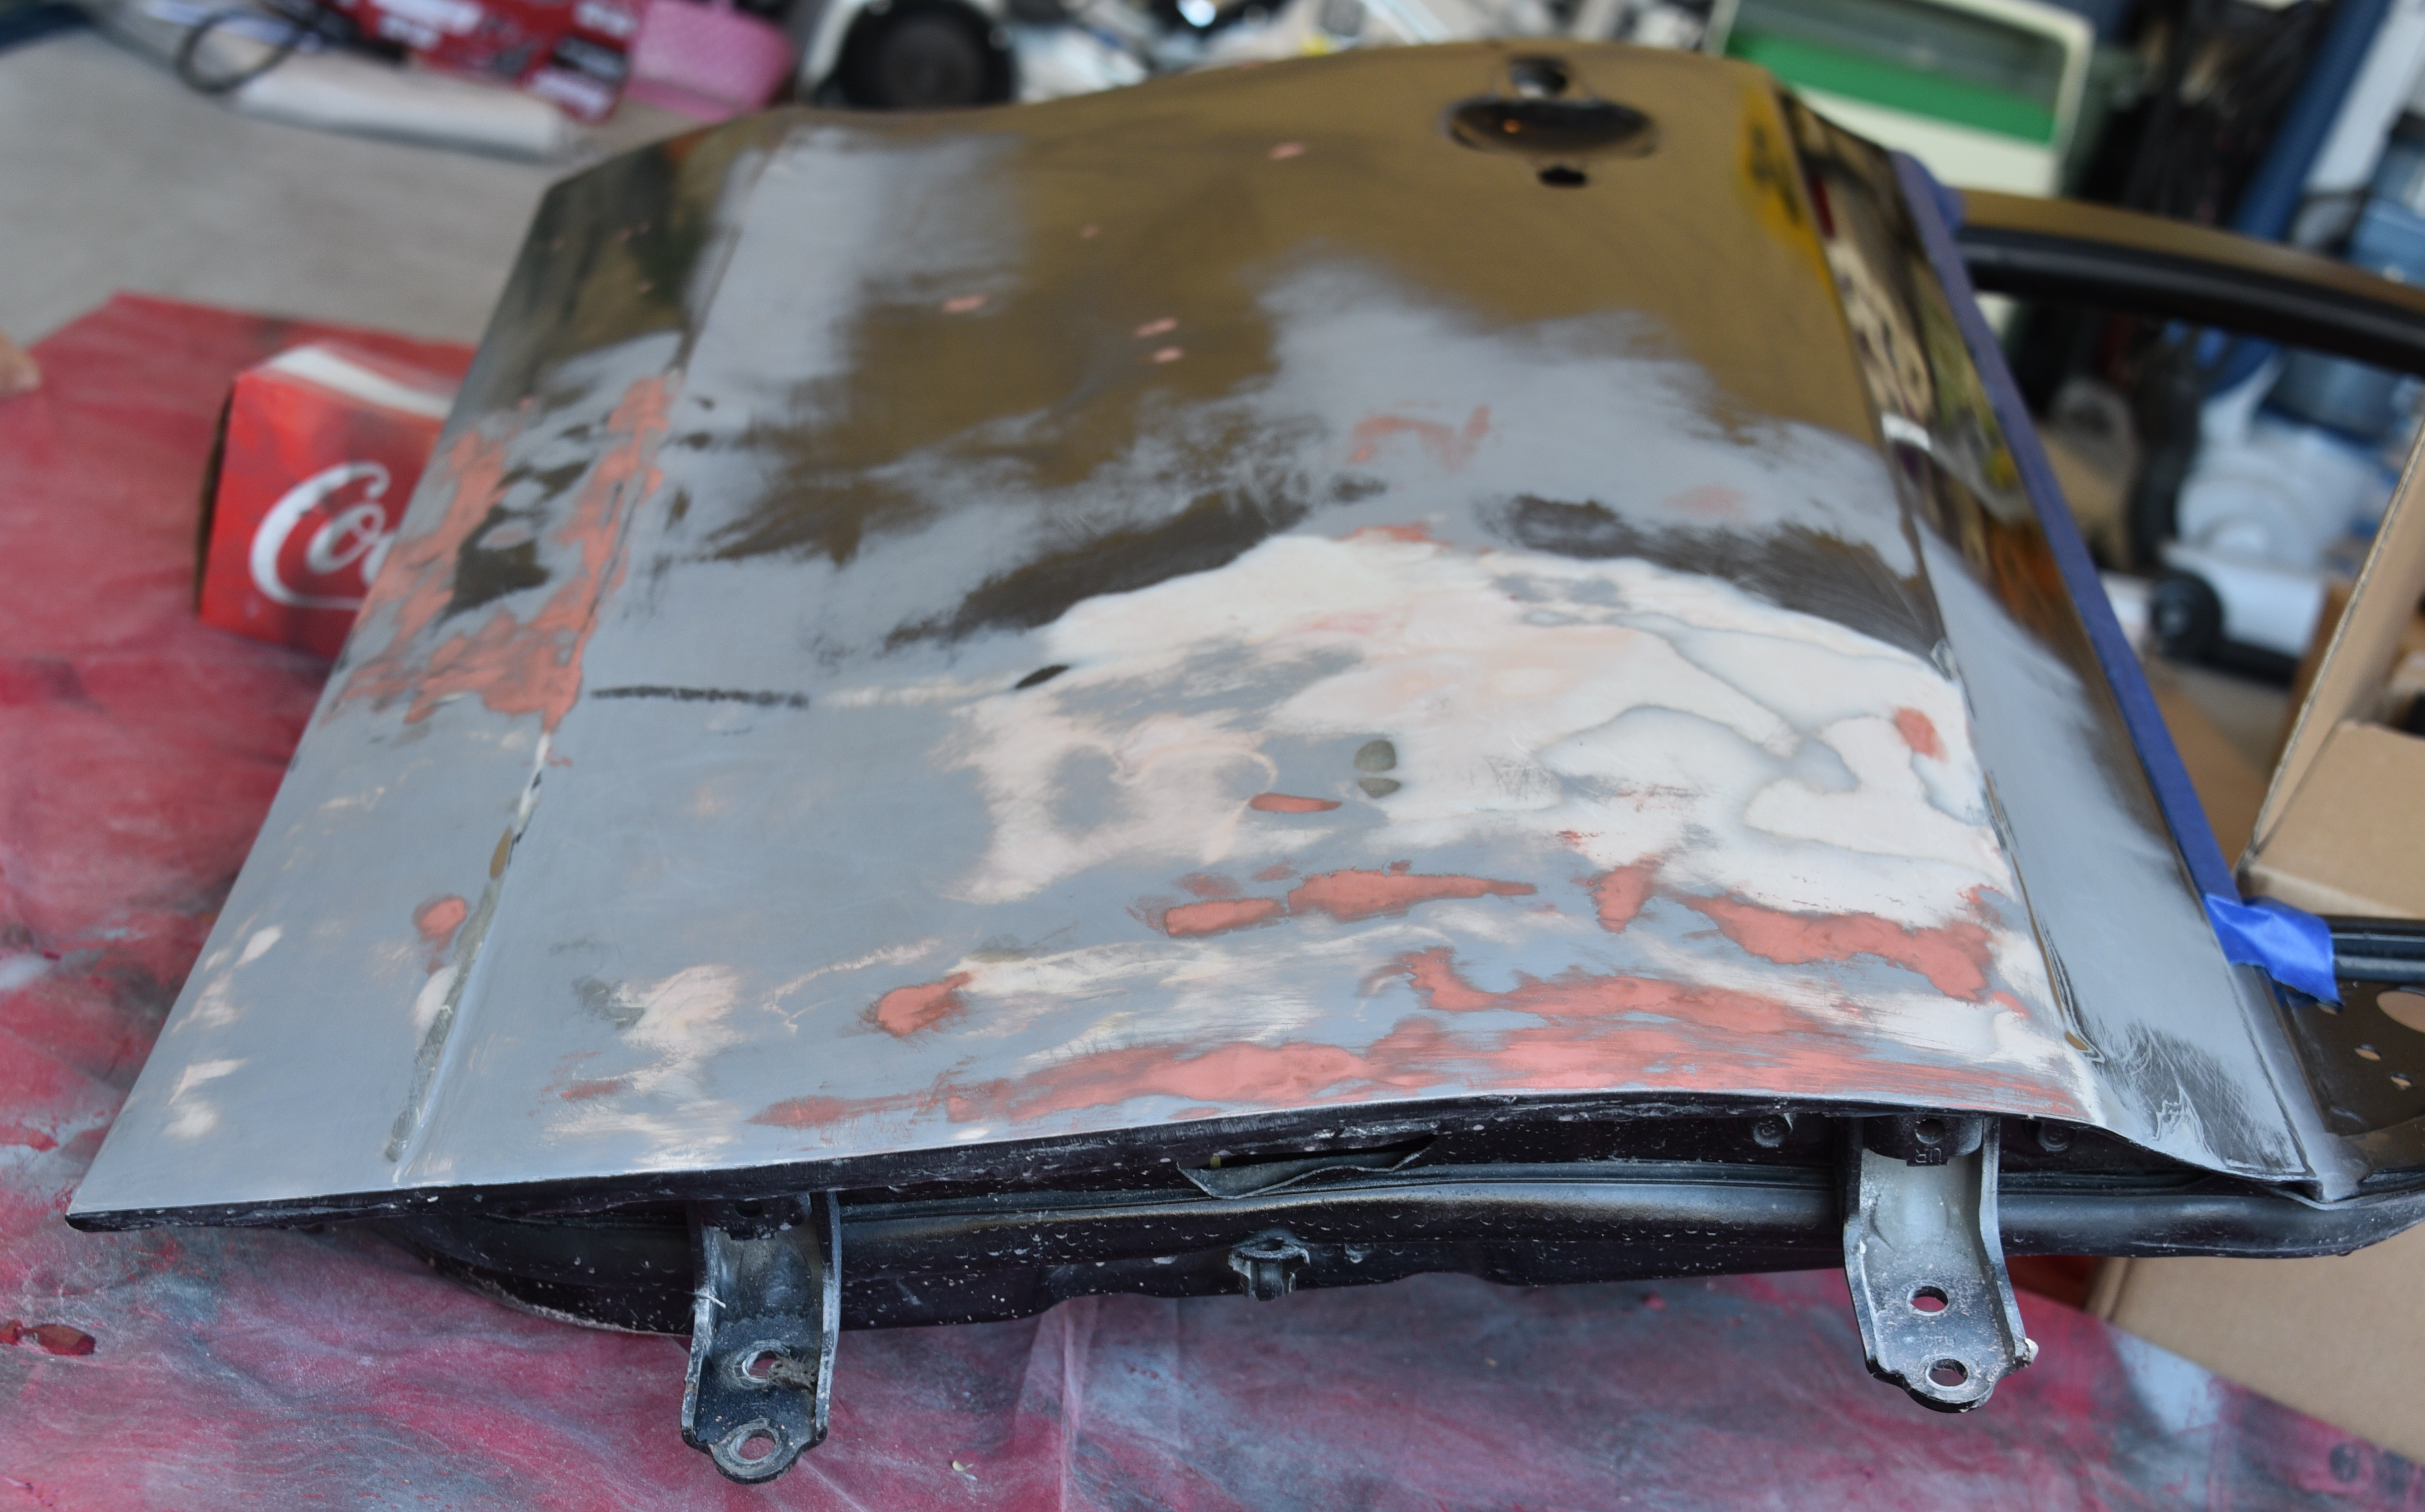
After a lot of leverage, including some applied via hydraulic rams, a reasonable facsimile of the original door structure was obtained. The next step was to apply liberal amounts of Bondo™ epoxy filler to smooth out the remaining defects and replace the rusted metal near the left-hand rear wheel well.
The garage was turned into a low-tech paint bay by taping plastic sheeting over the interior door frame to minimize fume intrusion into the house. A rope was strung on 4 hooks that formed a rectangle on the ceiling and tied at one end. The other end was tied to a brick and left hanging, thus using gravity to obtain free constant tension in the same fashion as overhead catenary lines on an electrified railroad. Plastic sheeting was hung from the rope to make a three-sided box leaving the open end to be formed by the garage door. The inside of the garage door was similarly taped with plastic sheeting and magnets were used to keep the sheets from billowing away from the door when in the elevated position.
Since the car could no longer move under its own power, it needed to be pushed into the garage using wheel dollies and the physical effort of multiple people. It would be in there far, far, far longer than originally anticipated.
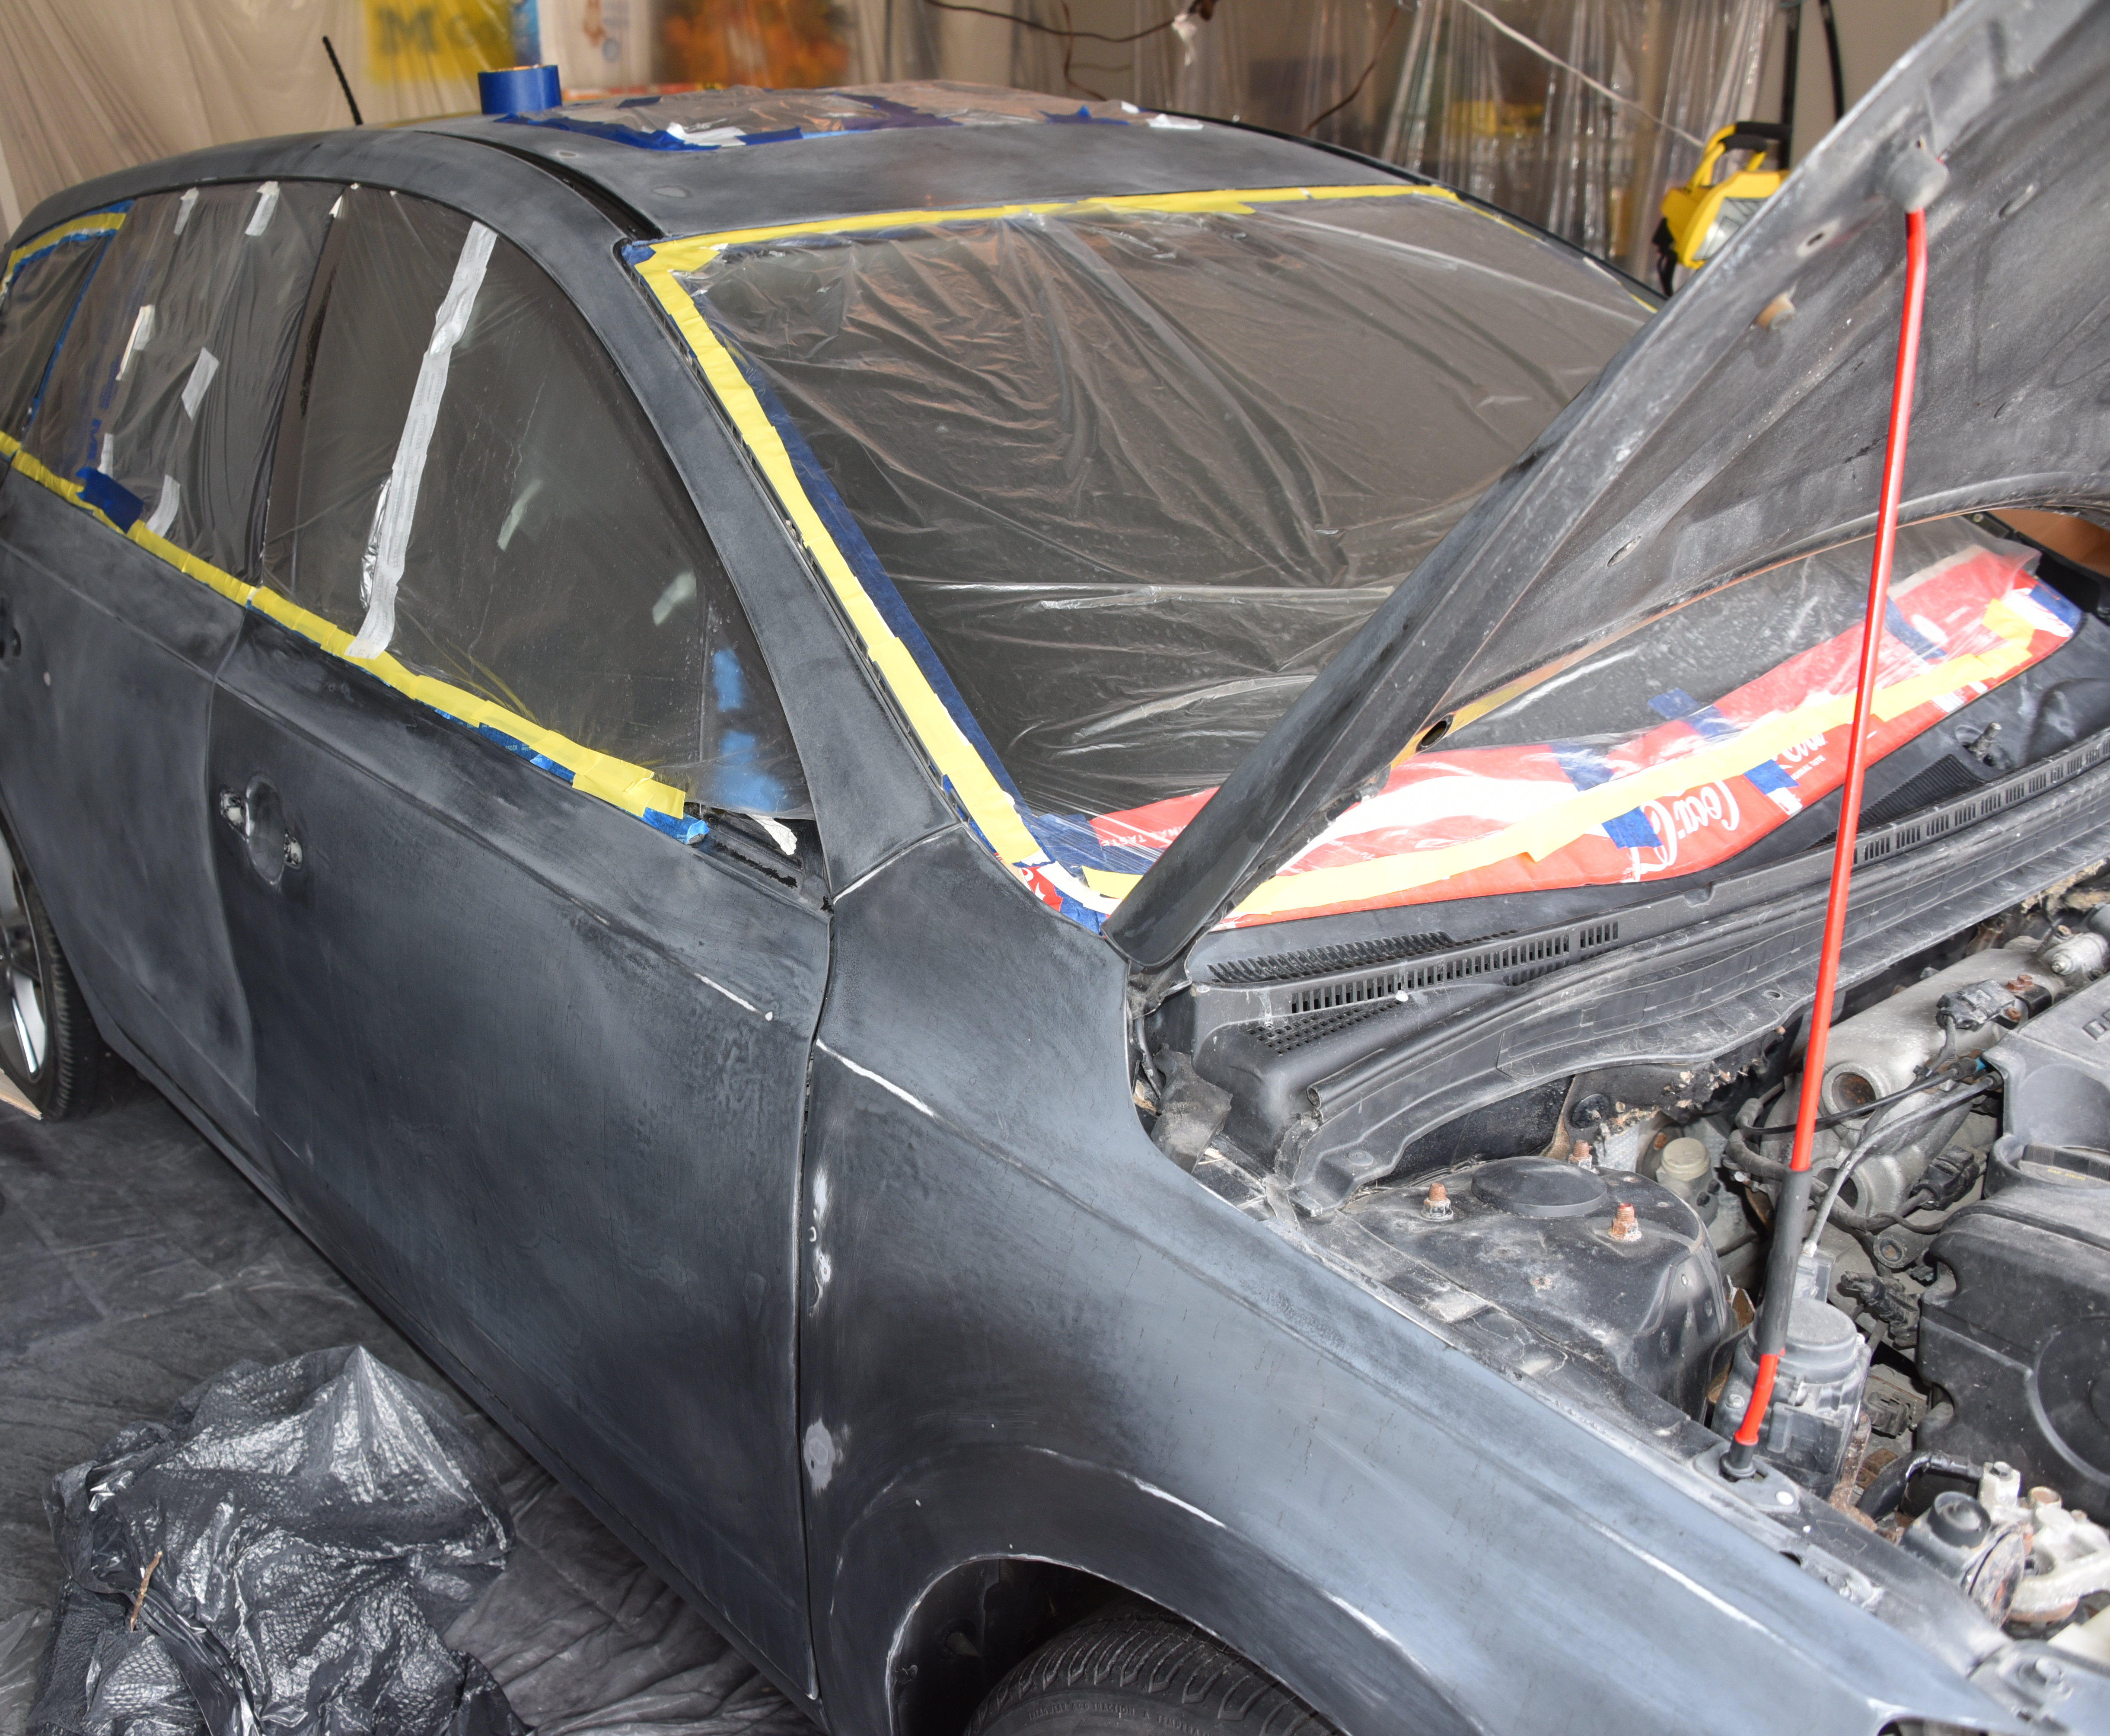
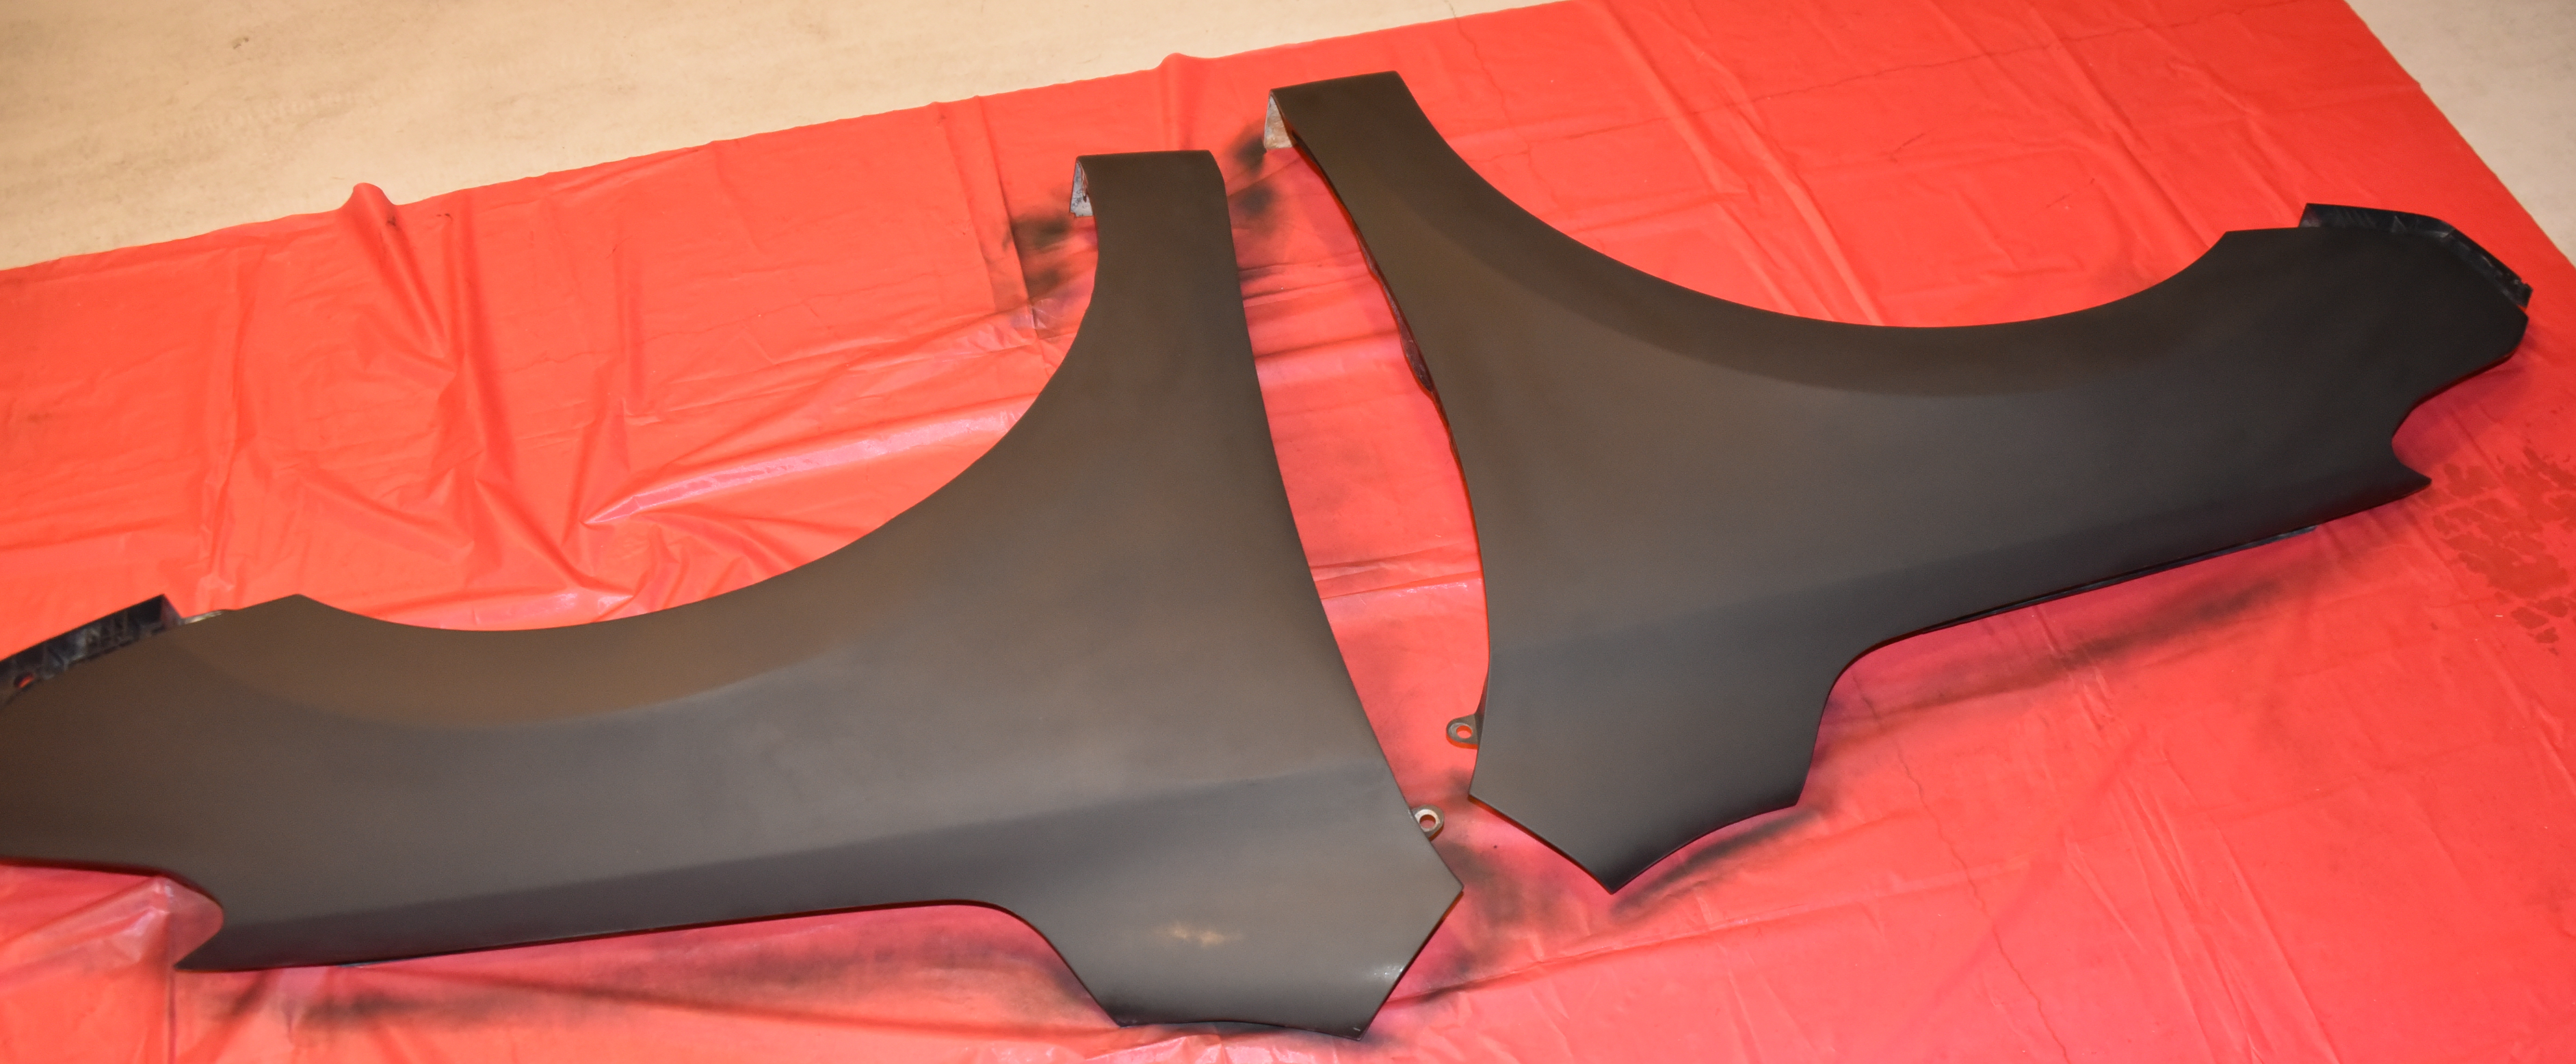
After surface preparation (sanding, filling chips and dents), the car was repainted with an epoxy primer. Under ideal circumstances, the work would have flowed immediately to application of the jet black base coast; however, the garage was not a dust-free environment. After the epoxy layer had cured, dust defects were scraped, cut, or sanded away. My go-to tool was a Festool tungsten scraper; although as expensive as a piece of jewelry, it has the ability to shave paint runs or dust defects with precision.
The base coat was applied next and required a similar process of waiting for it to dry, removal of any defects and touch up as needed to obtain a final coat.
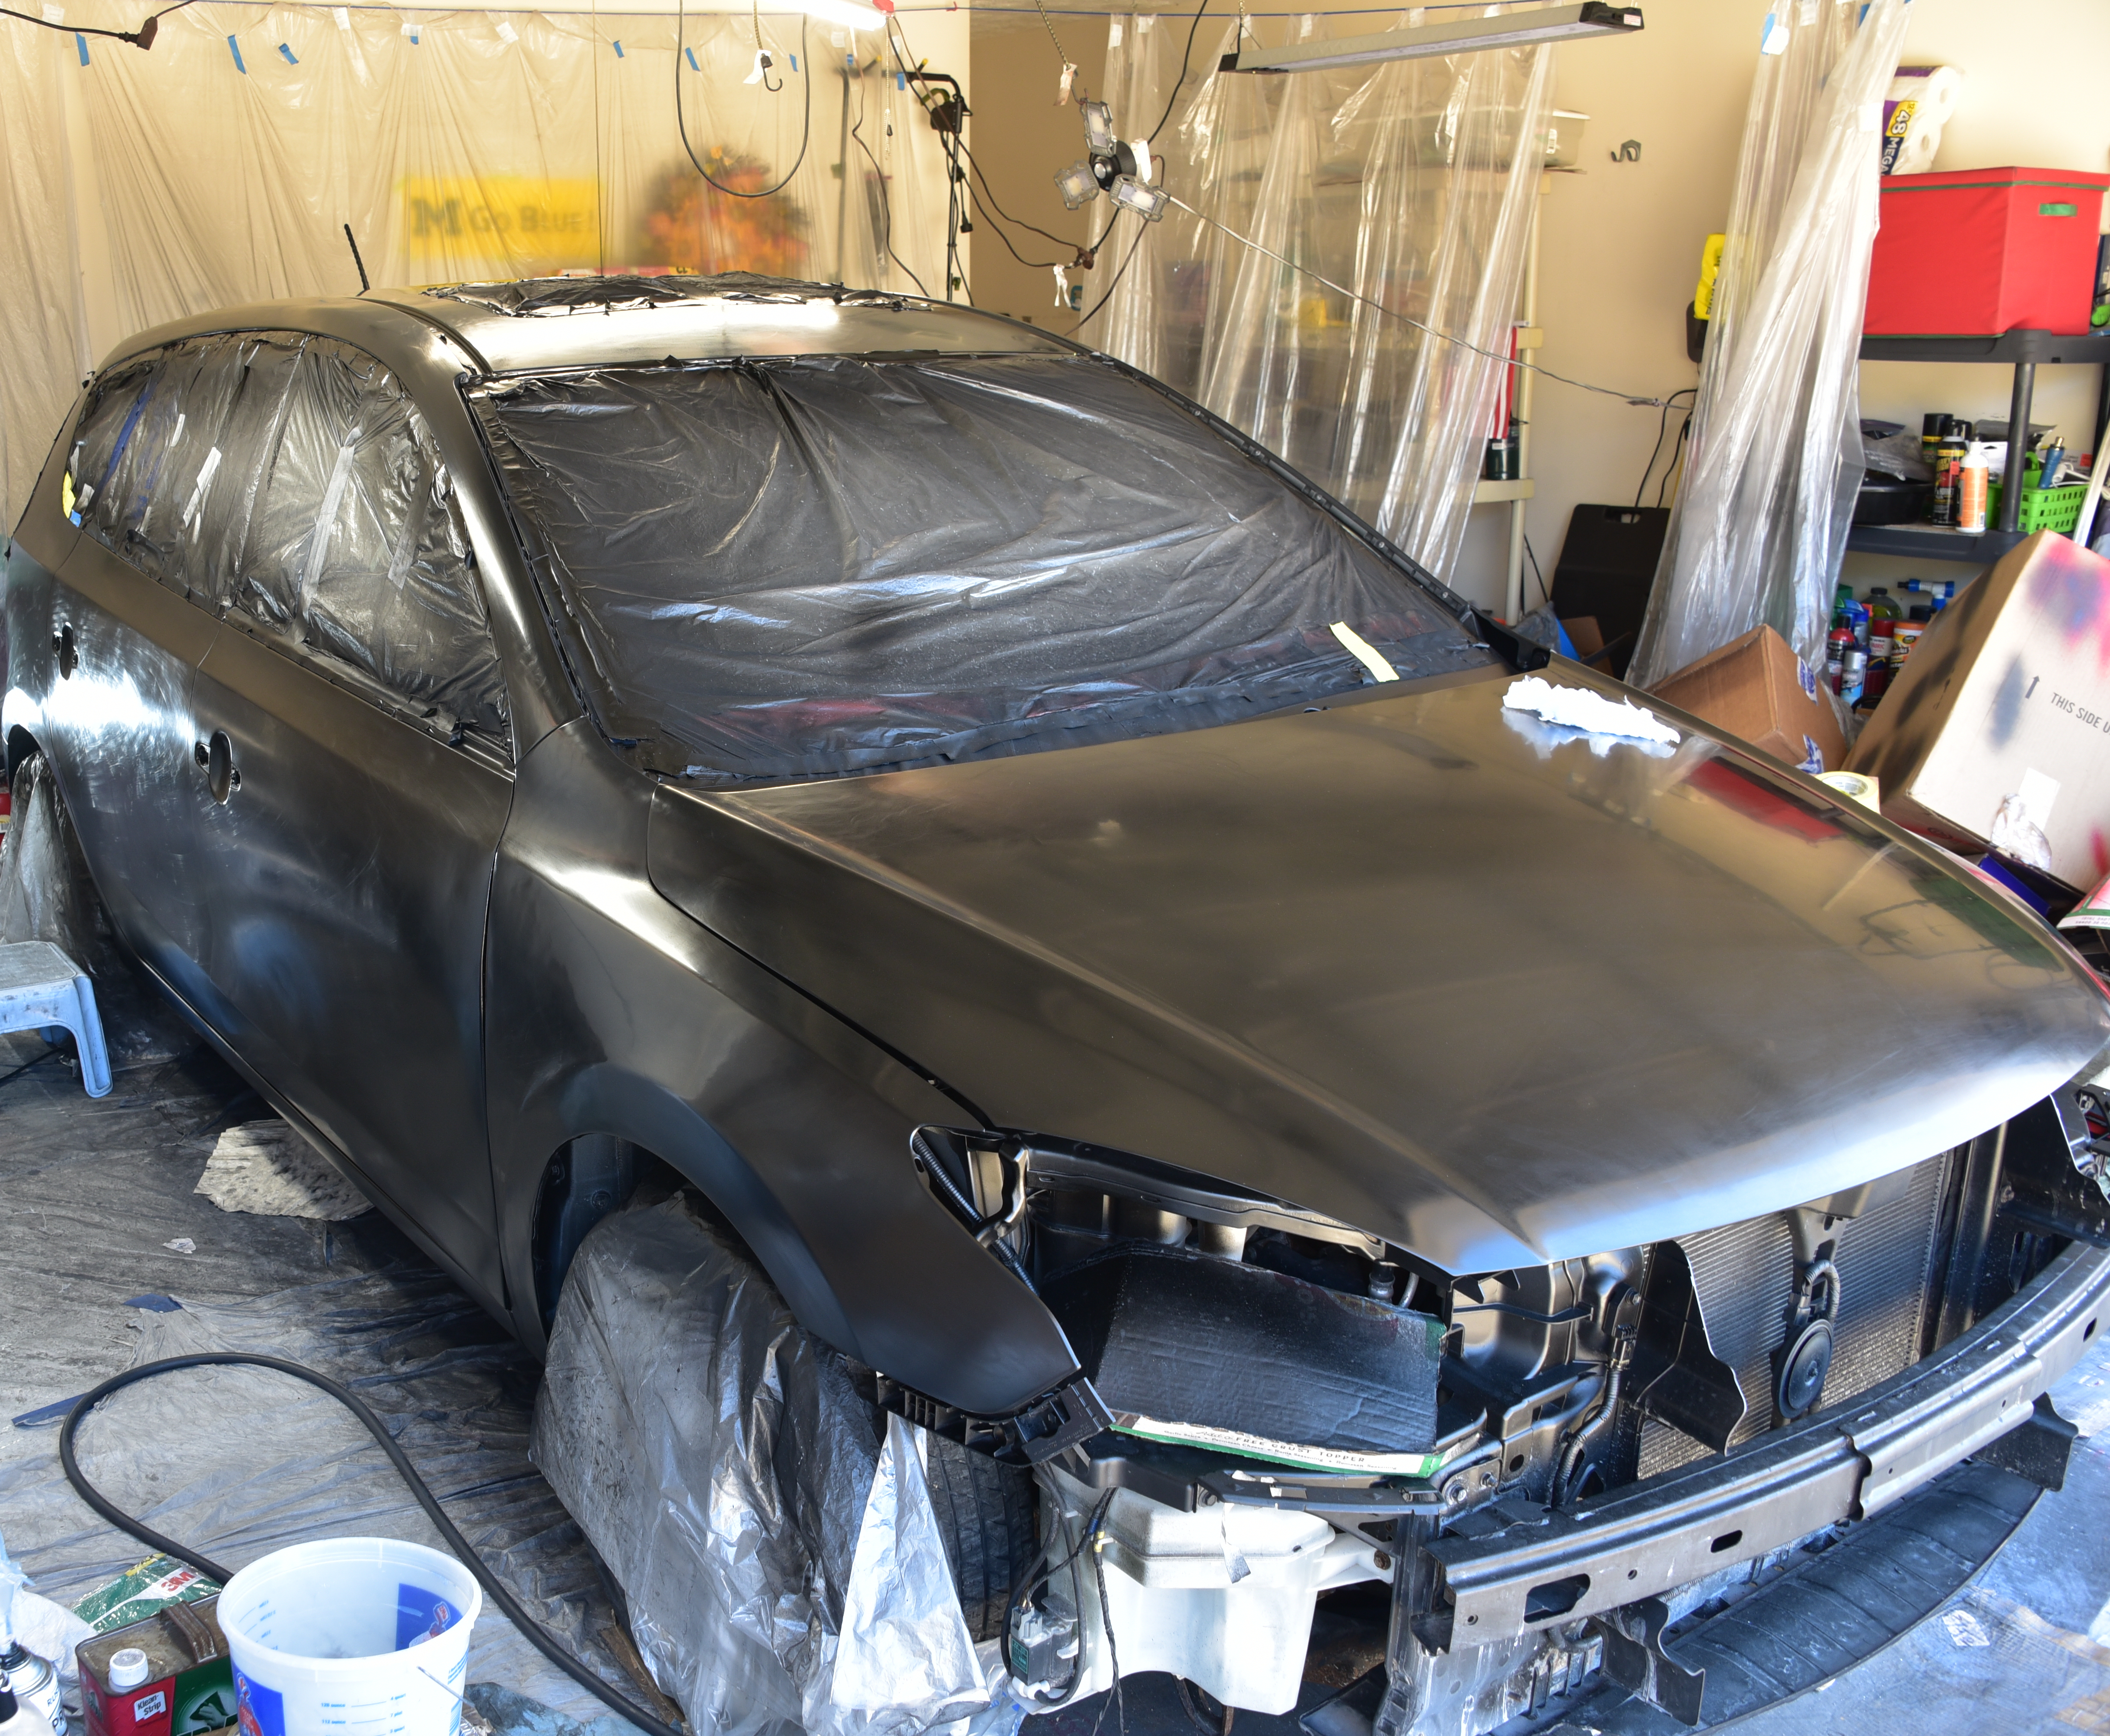
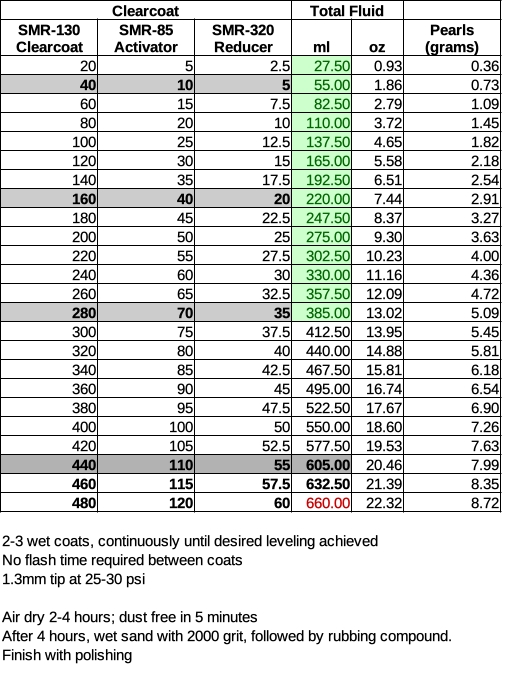
Again, under ideal circumstances, one would have been able to move immediately onto applying the clear coat layer after the base coat had dried for about an hour. Alas, having to wait meant that the clear coat layer would indeed be a distinct layer rather than being chemically bonded to a still drying base coat. The original paint job was a black pearl, so pearls had to be mixed into each batch of the clear coat.
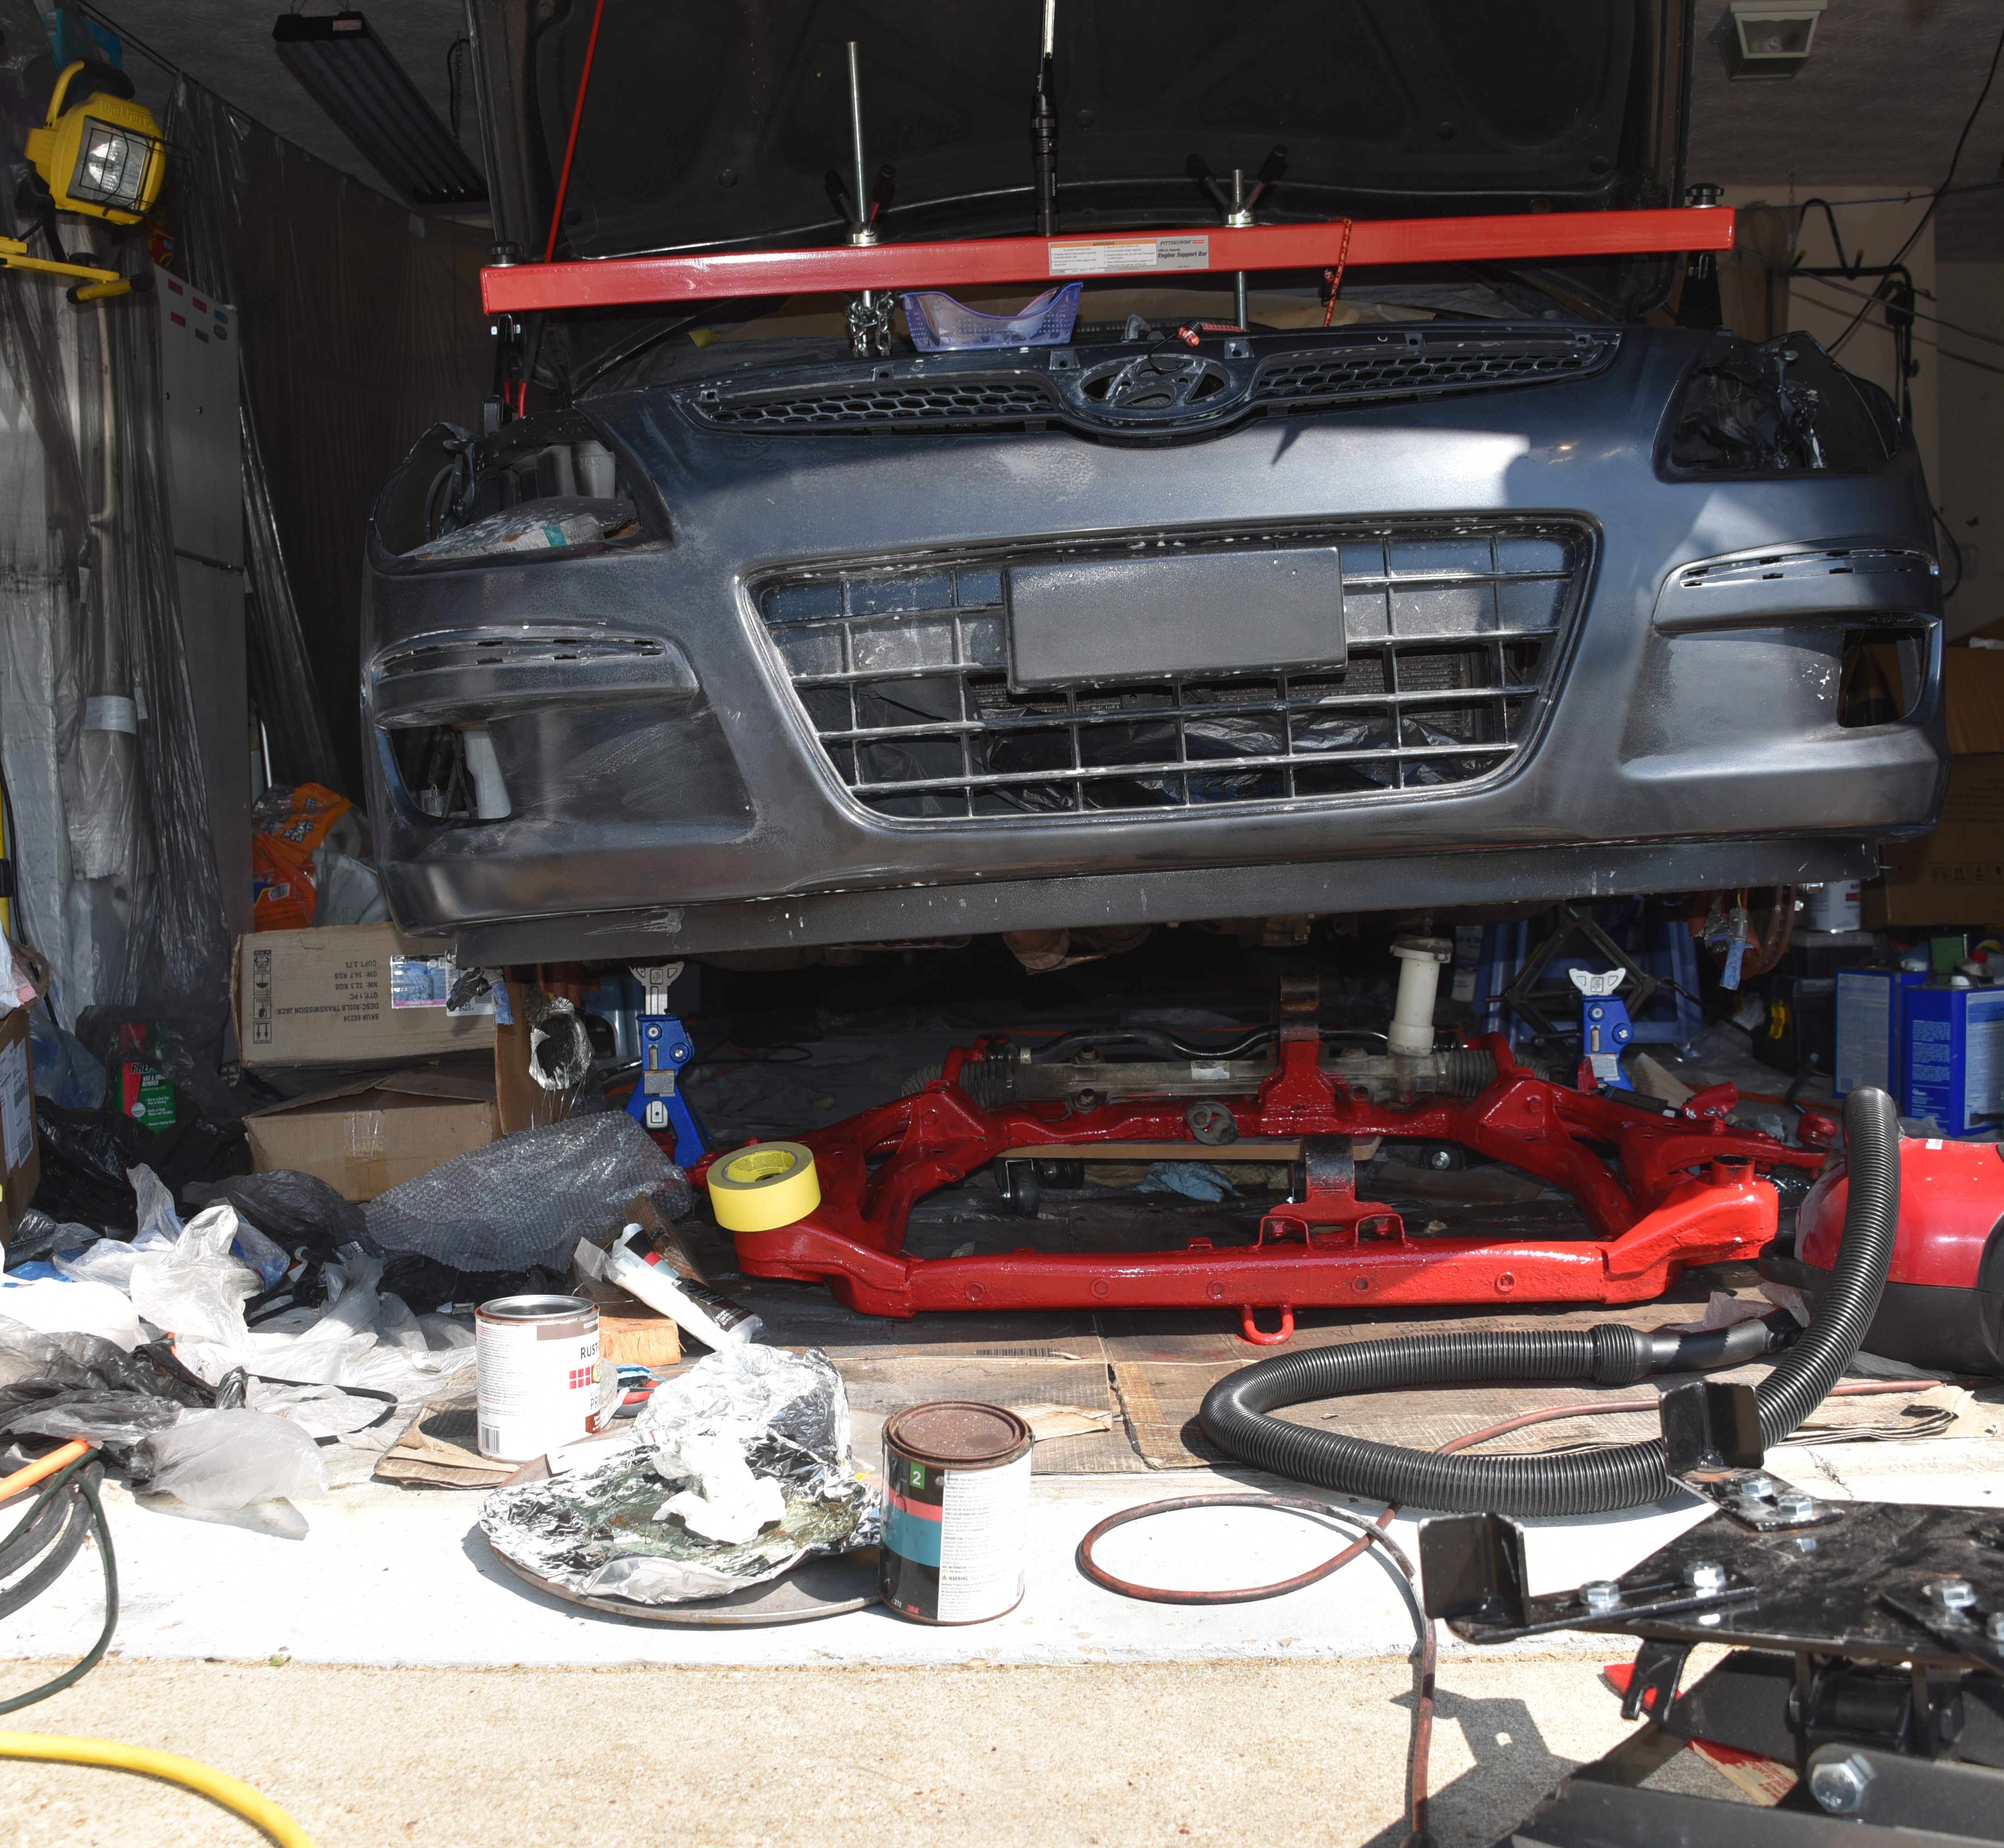
The clutch still needed to be replaced to return the car to operation. That entailed supporting the engine block by hanging it from a support bar, removal of the sub-frame, both front axles, and the manual transaxle.
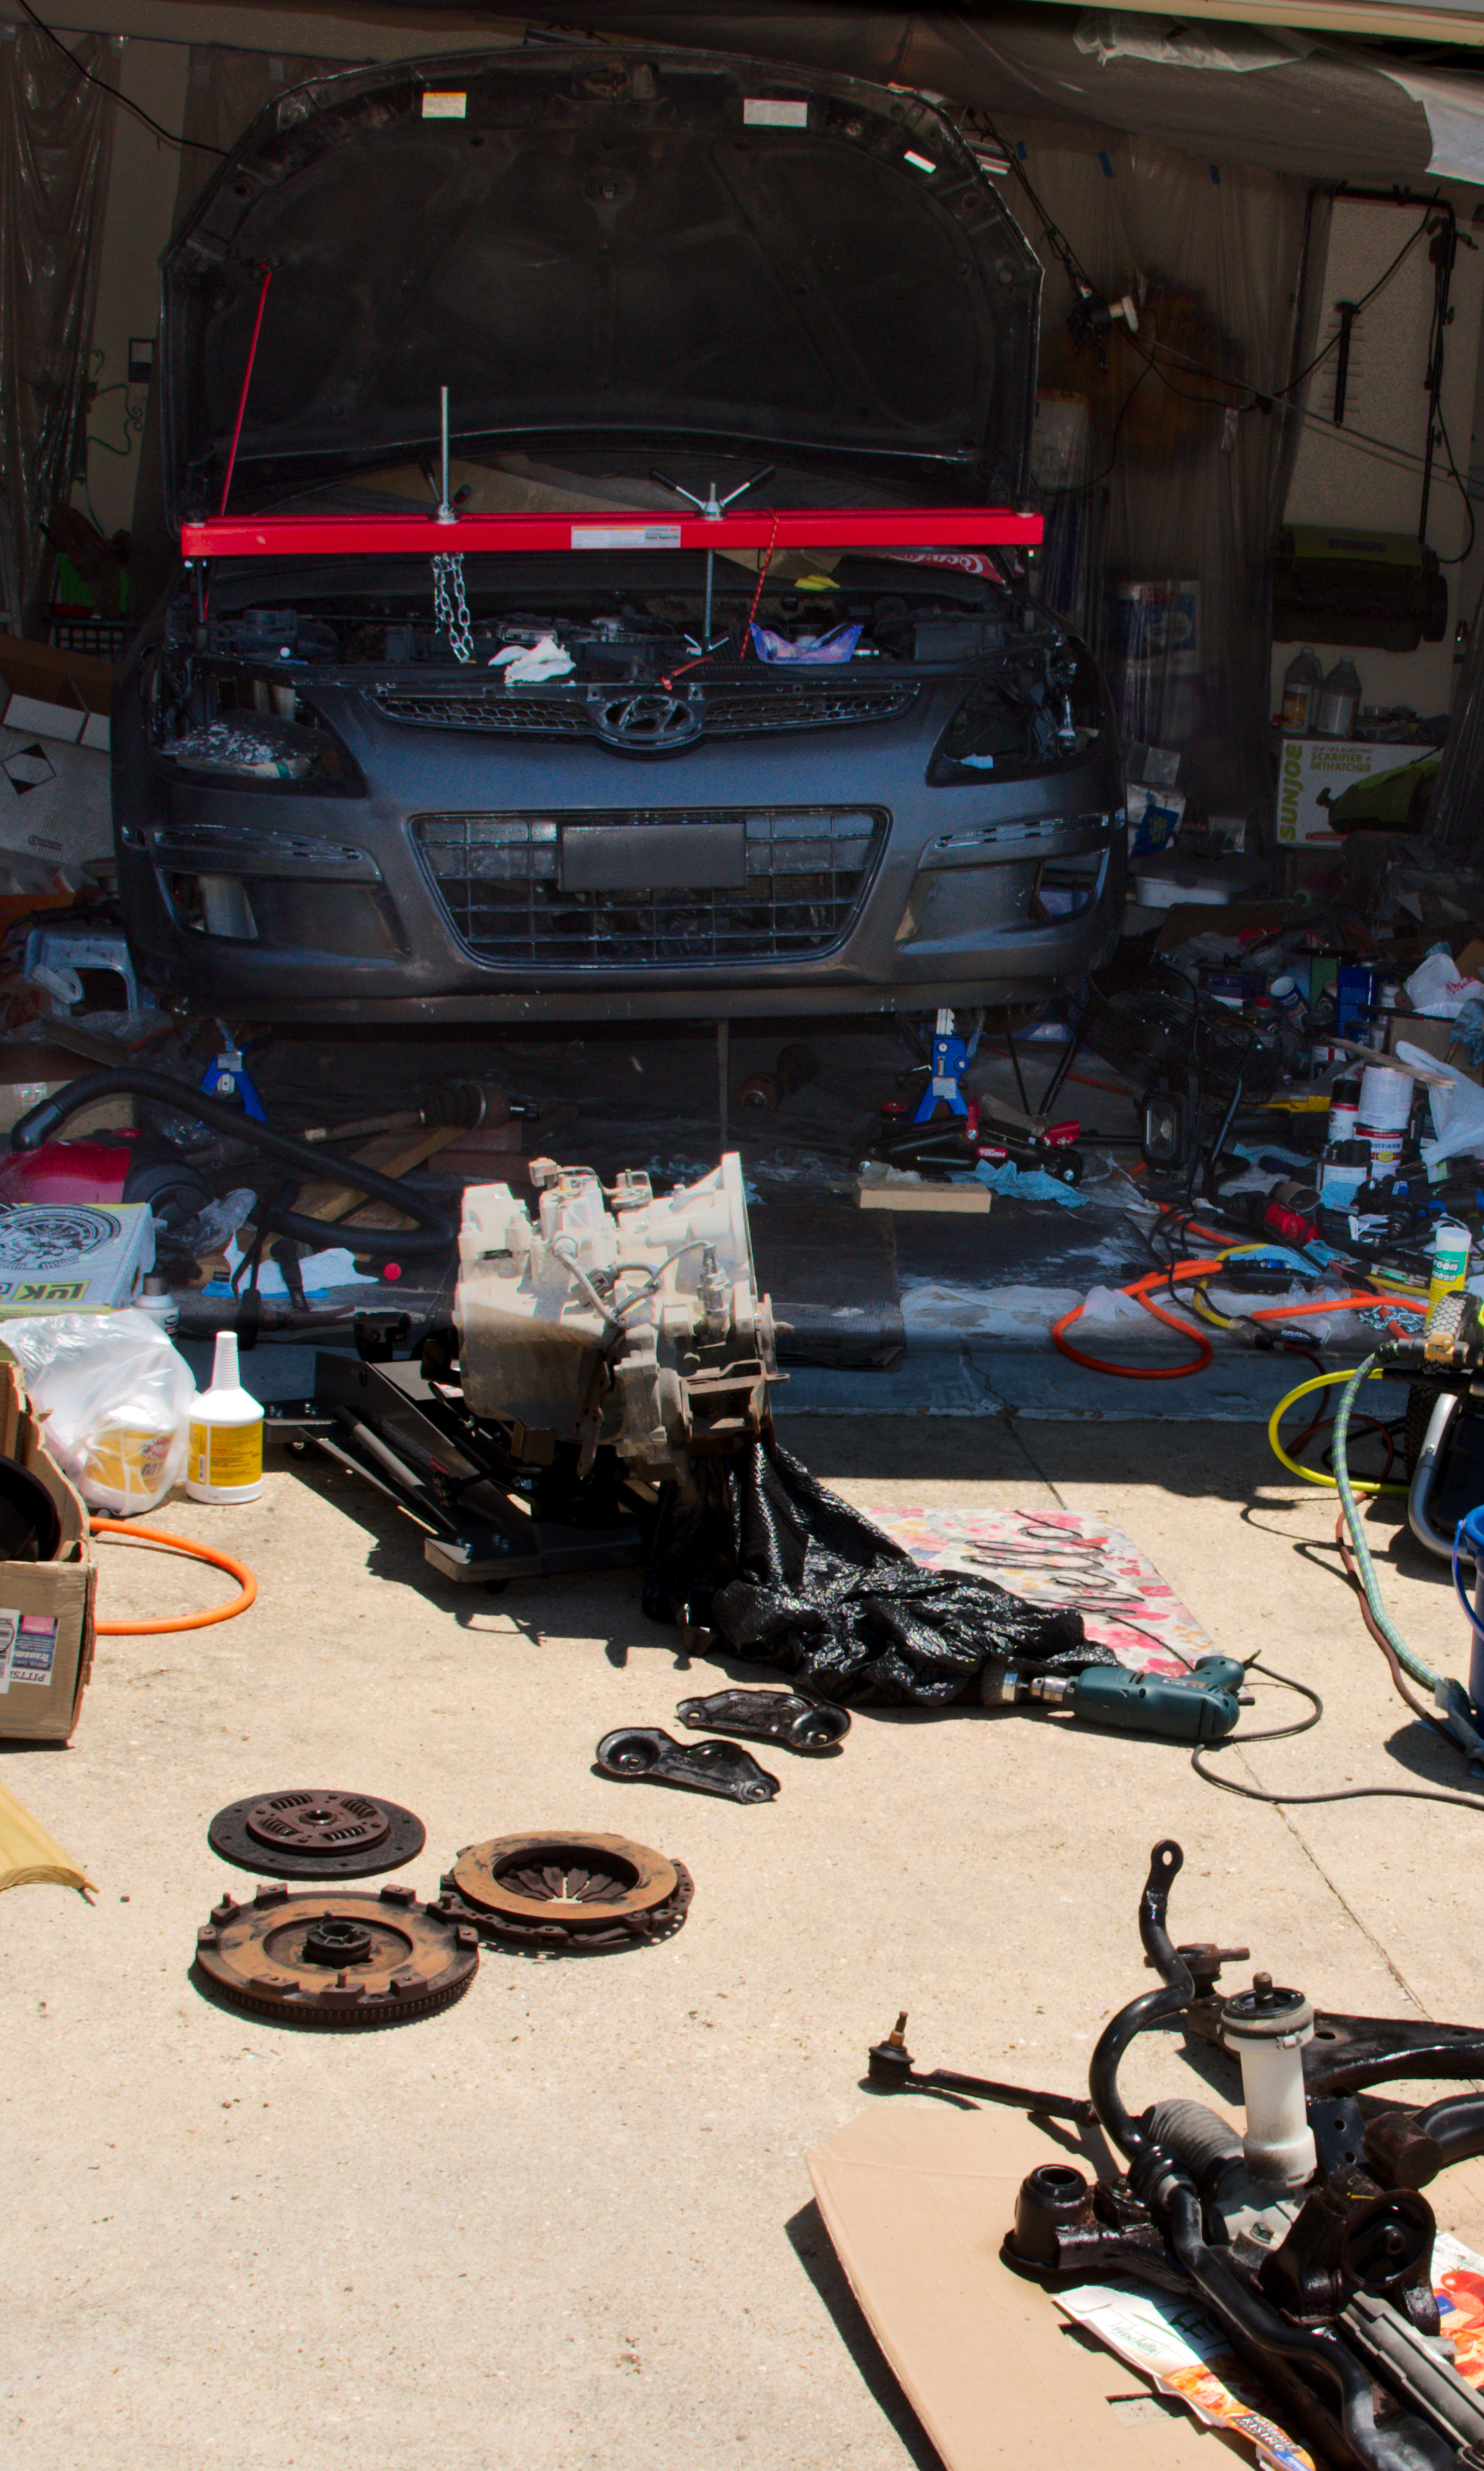
There was not a lot left in the engine bay after the transaxle was removed:
Getting the clutch cover back on was difficult. It fell off the jack more than once and my hand was beneath it on one occasion. Ouch! Affixing the clutch cover to the transmission jack using multiple ratcheting straps provided enough rigidity to align the cover.

The sub-frame was painted red for a sportier look before being re-hoisted and bolted back on.
Fortunately, a future tragedy was averted. The brake line running to the right-hand rear brake caliper burst before the car could be driven out of the garage. That required removal of the original, threading a new line through the underside of the car, adding the appropriate flare fittings and reassembling everything. While this was a very unwanted extra effort, having the brakes become inoperable in the garage rather than when attempting to come to a stop at the end of an off-ramp was very fortuitous.
After initial sanding of the clear coat, the refurbished exterior looked like the following:
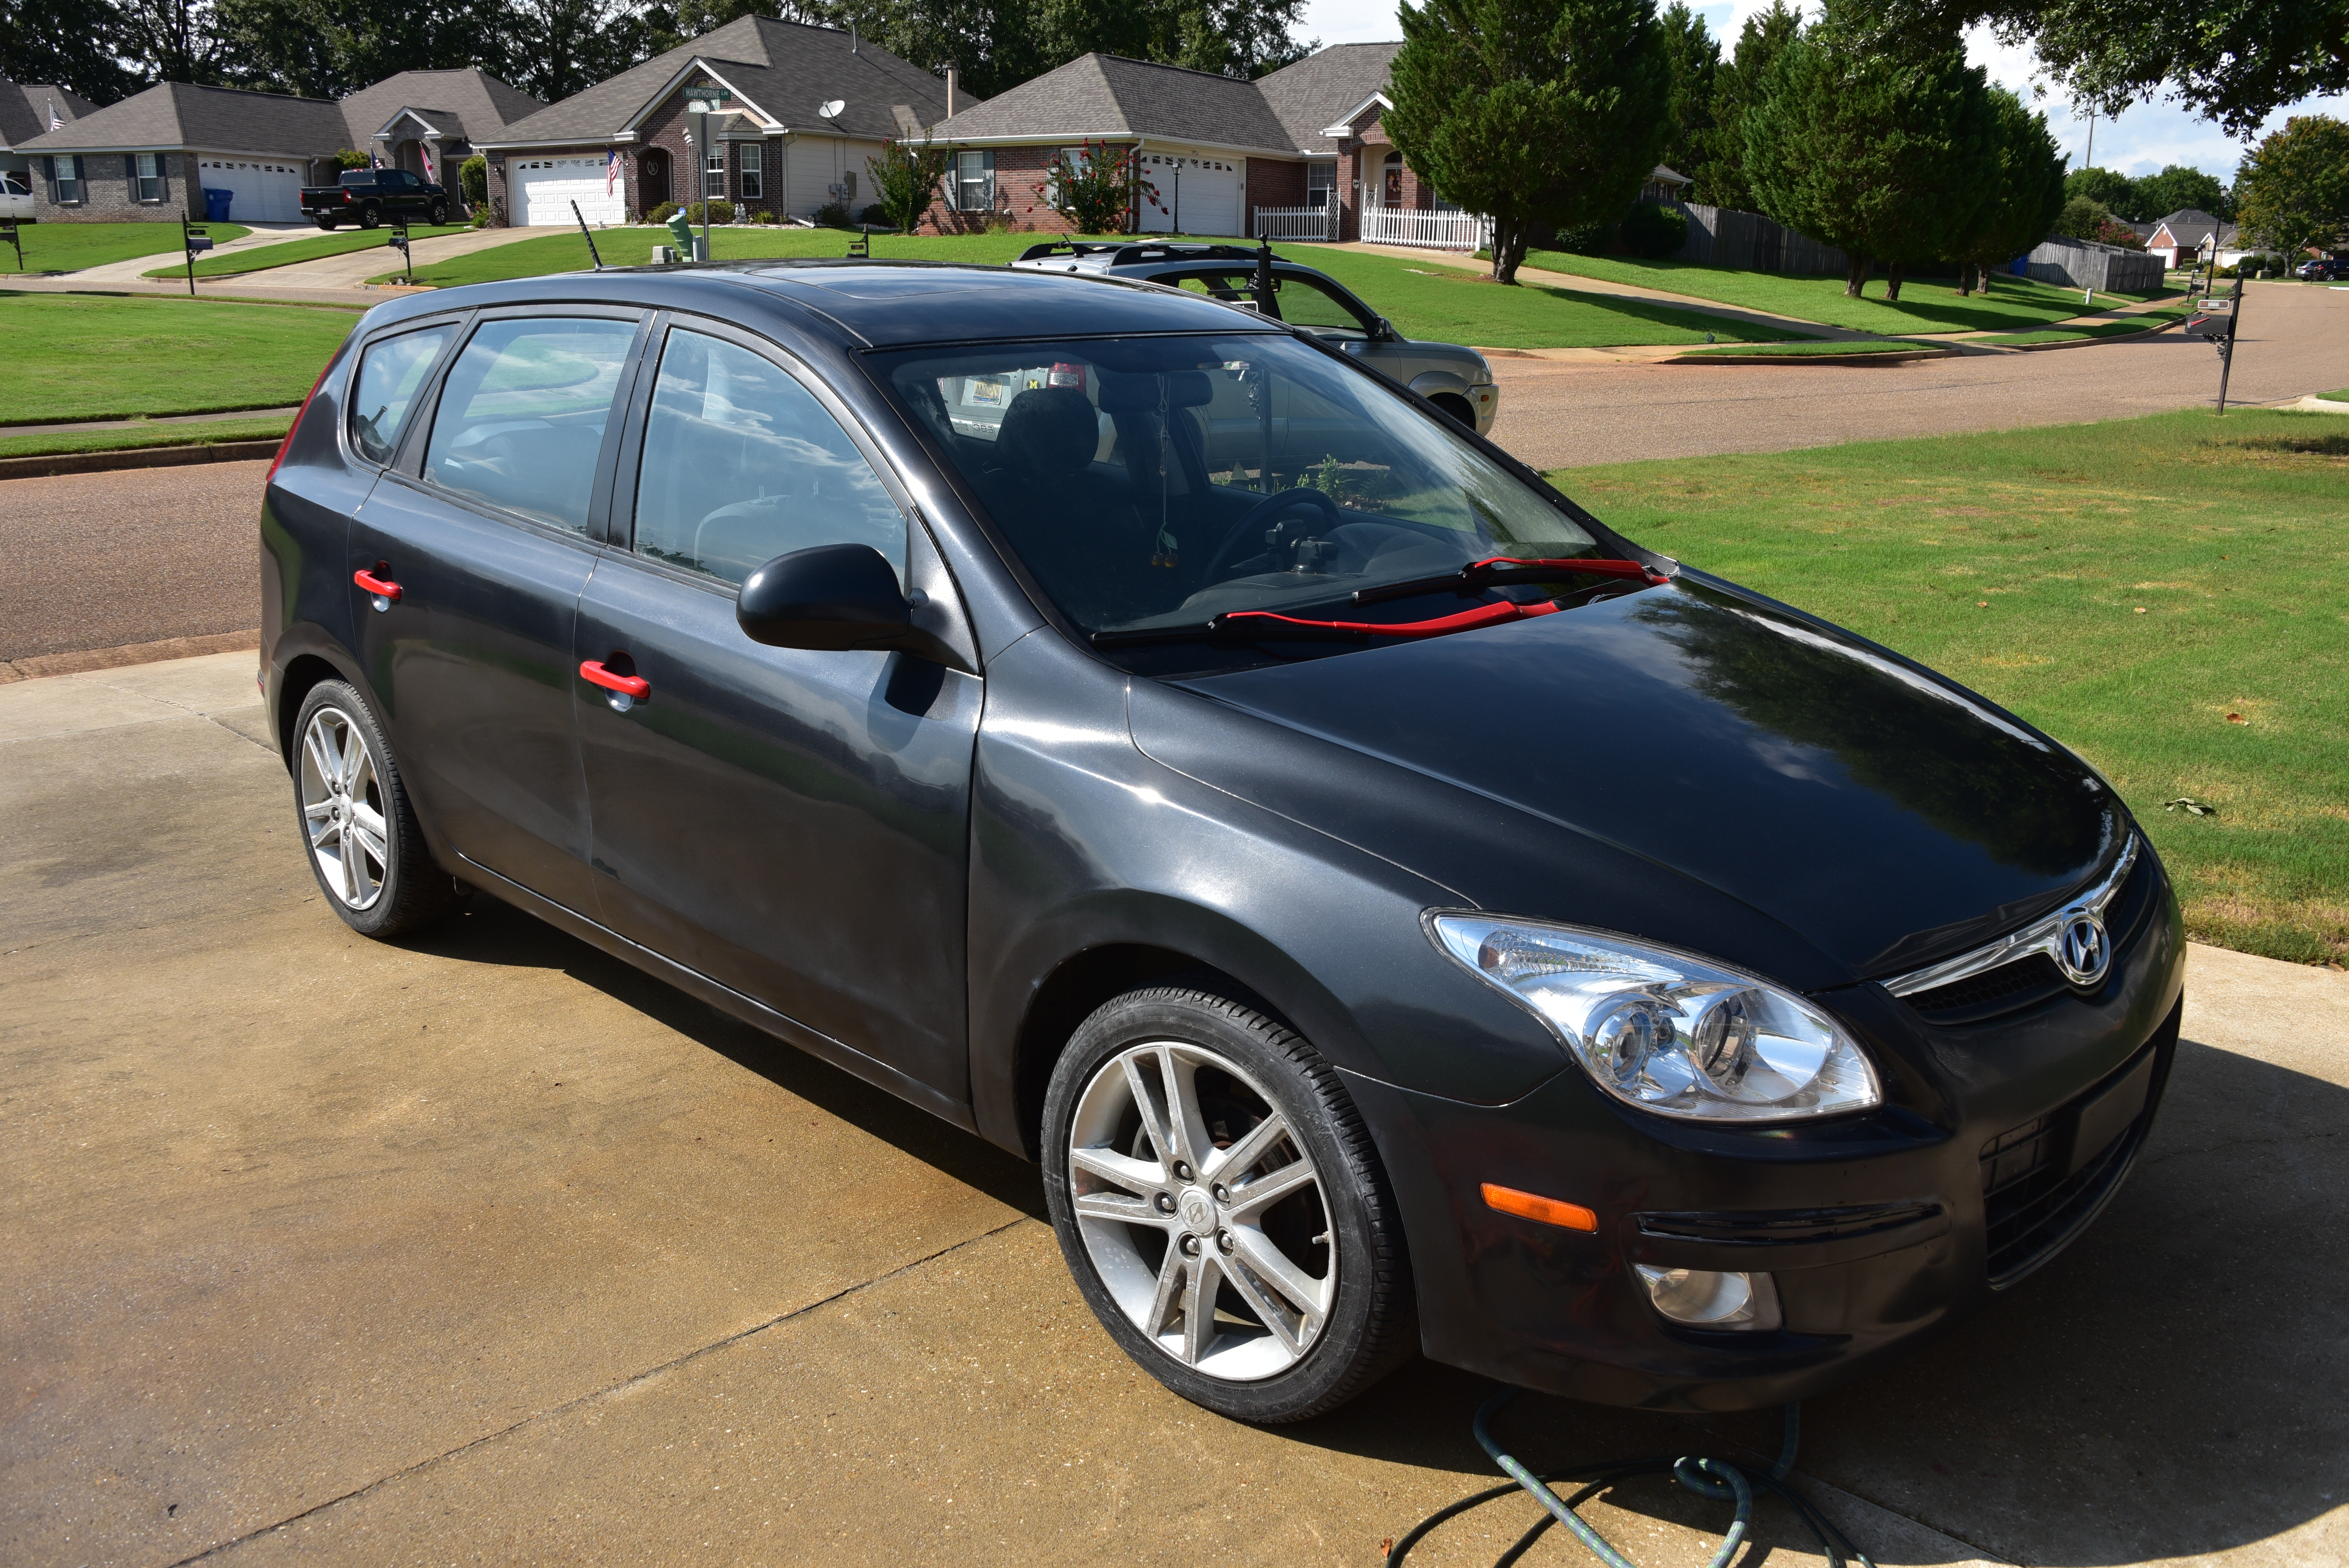
And with that, it was time to return the car north to its owner.
The following charts provide common mixing ratios for the various painting stages. The underling spreadsheet is available upon request.
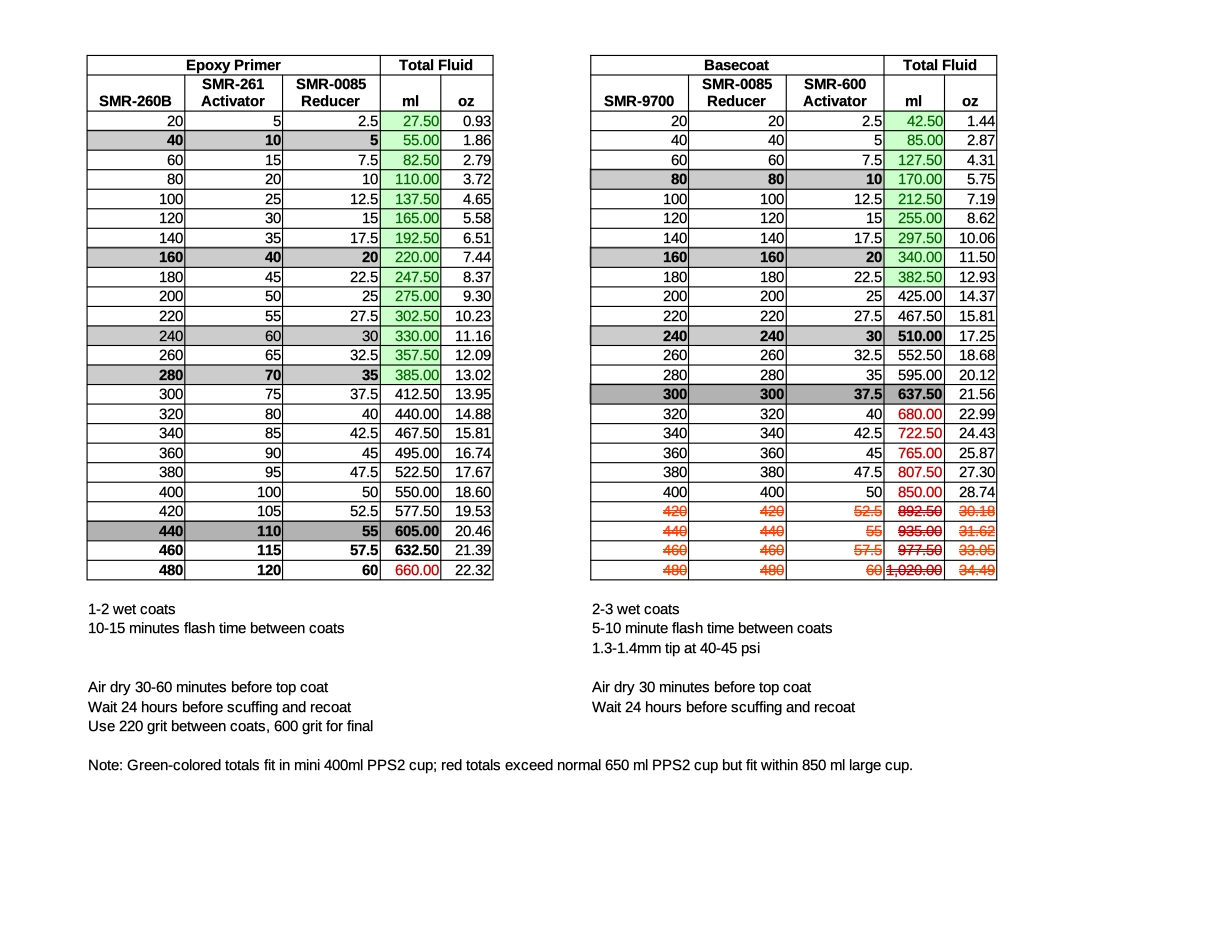

Last updated: April 12, 2024